Installation guide for the United Manufacturing Hub using k3os
This chapter explains you how to install the United Manufacturing Hub.


Welcome to the United Manufacturing Hub Stack installation guide. In this guide, we will walk you through the process of installing the stack on an edge device. This process is divided into three parts: first, the installation of k3OS, followed by the setup of the stack within UMHLens. Please note that while the accompanying videos may be helpful, some of the information may be outdated. Refer to the text on this page as well as the description of the youtube videos to verify if the information is still up to date. Make sure you have the necessary hardware and prerequisites before beginning the installation.
Hardware requirements
minimal:
- 2 cores CPU
- 4 GB RAM
- 256 GB SSD
recommended:
- 4 cores CPU
- 8 GB RAM
- 256 GB SSD
Installation
Depending on your situation you might want to deviate from the guide to do some adjustment but for your first installation it is recommended that you stick to it!
Prerequisites
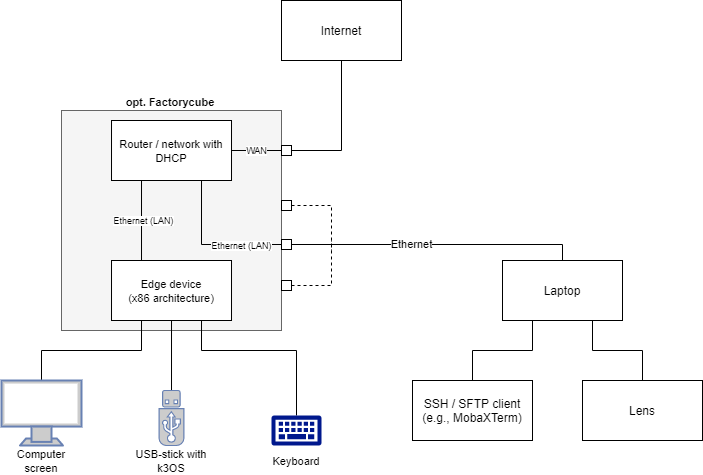
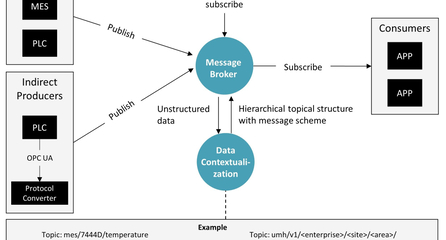
As you can see in the illustration, there are some prerequisites for the installation.
The following things are required:
- an edge device with x86 architecture, we recommend the K300 from OnLogic
- the latest version of k3OS
- a computer with an SSH/SHTP client (we recommend MobaXTerm if you are using Windows or inbuilt Linux commands if you are using a Linux OS) and UMHLens installed. We recommend a laptop with an Ethernet port or an Ethernet adapter.
- local LAN (with DHCP) available via at least two Ethernet cables and access to the internet.
- a computer monitor connected with the edge device
- a keyboard connected with the edge device
Video guide
This is a step-by-step video, which will chaperone you through the first two steps of the installation:
The following video will show you how to do the third step: the setup of the stack within UMHLens
If video guides are not your thing we also have a text based guide right below to help you with the setup!
Text Guide
Step 1: Installing k3OS on the edge device
- Insert your USB flash drive with a flashed image of k3OS into your device
- Boot from the USB flash device. To do this you need to go into the boot menu of the edge device.
- How to do this is different for every hardware and is described in your hardware manual.
- If you currently don’t have your hardware manual, you can test for the boot menu button by repeatedly pressing the F1-F12 keys during the boot process of the computer (right after you press the power button) as these buttons are frequently the boot menu buttons. Alternatively you can try the same with the “delete button”.
- Then select your USB flash device to boot from.
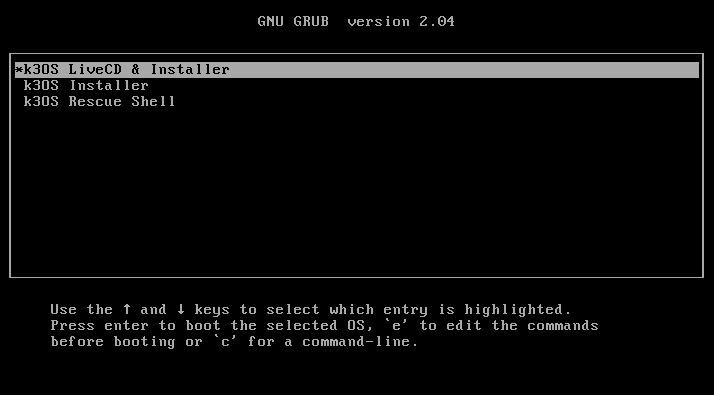
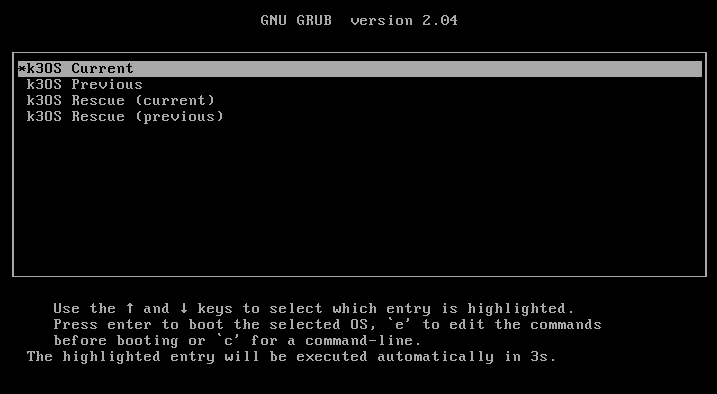
- You should now see the boot menu of k3OS as pictured below. Select “k3OS LiveCD & Installer”
- If you don’t see it, then you might have chosen a wrong device to boot from or need to flash k3OS on your USB flash drive again.
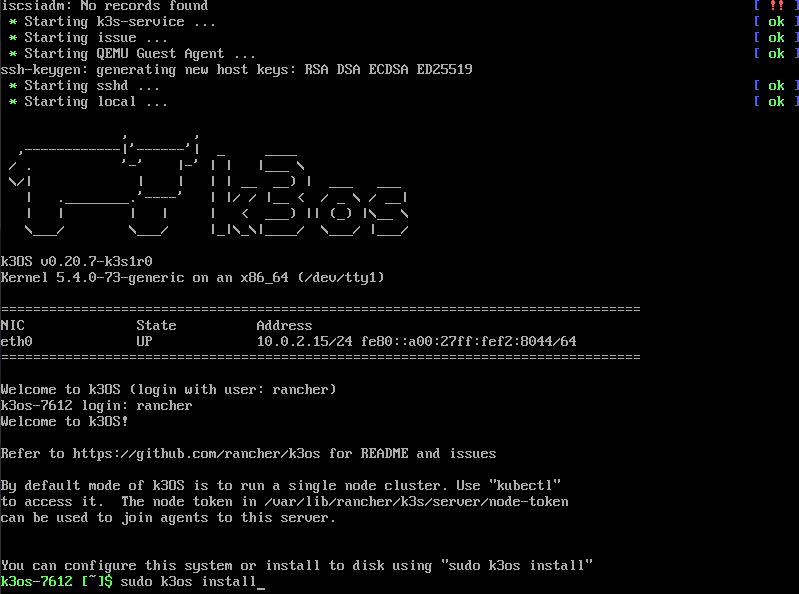
- Once the liveCD has sufficiently progressed, type in “rancher” as username and hit Enter.
- Type
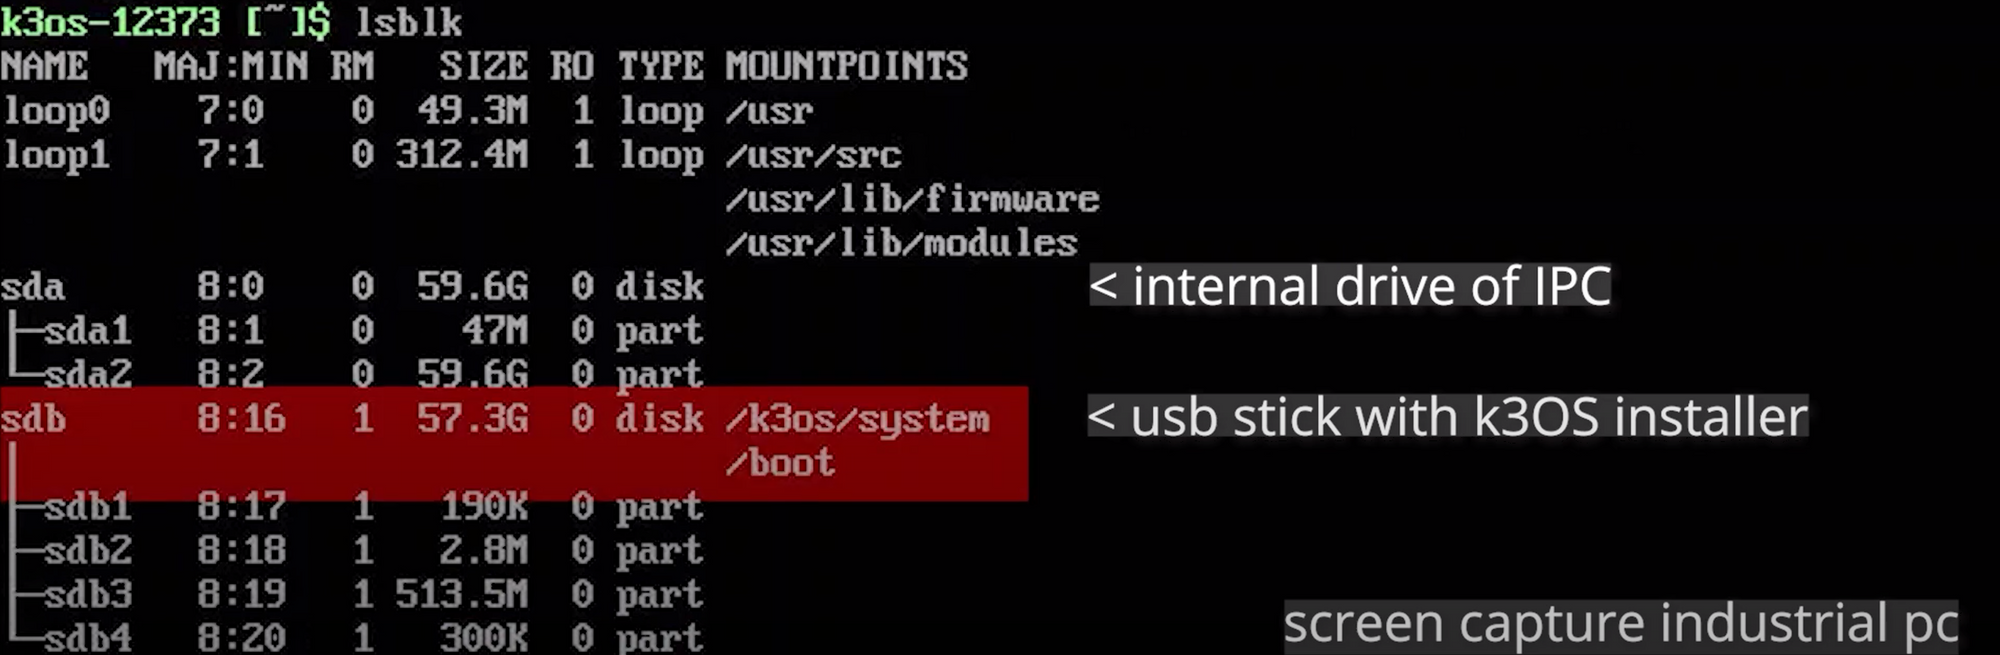
lsblkand hit Enter to get a rundown of the names of the different disks and find out which name the edge PC’s disk has.
- Type
sudo k3os installand press Enter.
- Press
1and then press enter to choose the option “Install to disk” - Press the correct number to select the option to install to the disk of the edge PC, which we have identified in the 5. substep.
- The system will now ask you if you want to use a cloud-init file with the installation. Press y and then Enter.
- The system now wants the location of the cloud-init file for the installation. Type in https://umh.app/development.yaml and press enter.
- If this step is unsuccessful, you might either have a bad internet connection or the edge PC is not connected to the internet at all.
- Press y and Enter to continue the installation.
- At the end of the installation the edge PC will restart. Make sure to remove the USB flash drive from the PC so it doesn’t boot from the USB flash drive again.
- After restart wait 60 seconds for the automatic setup to take place.
Wait for the automatic setup to be finished and SSH authentication to be enabled.
Step 2: Connecting with the Edge PC via SSH authentication
Now we use the other PC device, presumably a laptop, to connect to the Edge PC via SSH authentication. This has the advantage that we can access the Edge PC without the need to plugin a keyboard or a monitor. For this installation guide we assume you are using windows as your operating system.
- Open MobaXTerm on your device. You can get MobaXTerm for free from their Website. https://mobaxterm.mobatek.net/download.html
- Open a new Session by clicking on “Session” in the upper left corner

- Select SSH on the upper part of the new window and type in the IP address of the edge PC in the field “Remote Host”. Check the Box next to “specify Username” and type in rancher in the field next to it.
- Press OK to start the connection
- When connecting to the Edge PC it should ask for a password. The default password is rancher. Type it in and press Enter.
- You are now successfully logged in via SSH and the interface should look like in the picture below.
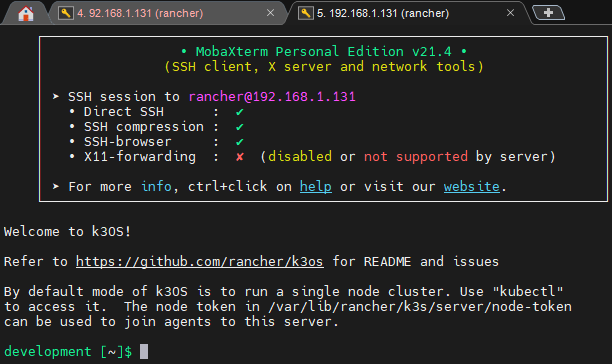
ifconfig eth0, where eth0 is the current ethernet port for the connection, to check the connection and the IP address.Step 3: Getting Kubernetes credentials and setting up UMHLens
- Open UMHLens on your device. You can get UMHLens for free from this GitHub Repository.
- Click the three horizontal lines in the upper left corner and choose files → preferences
- Click on Kubernetes and select “Add custom repo”, type in https://repo.umh.app as the URL and decide on a name for the repository.
- Execute
cat /etc/rancher/k3s/k3s.yamlin your SSH session on your laptop (e.g. in MobaXTerm) to retrieve the Kubernetes credentials. Copy the content of the result into your clipboard with Ctrl + C. - Click File and then Add Cluster.
- Paste the clipboard into the kubeconfig prompt of UMHLens.
- Change the IP Address in the kubeconfig to the IP address of the Edge PC. the port (the last 4 numbers after the colon) needs to stay unchanged.
- Click on Add Cluster.
- Click on the Cluster to connect to it.
- Write
helm repo add united-manufacturing-hub https://repo.umh.app/into the terminal of the UMHLens Cluster. - Write
helm repo updateto update. - Fully close the UMHLens App and start UMHLens again.
- Click on Browse Clusters in Catalog, then connect to the Cluster.
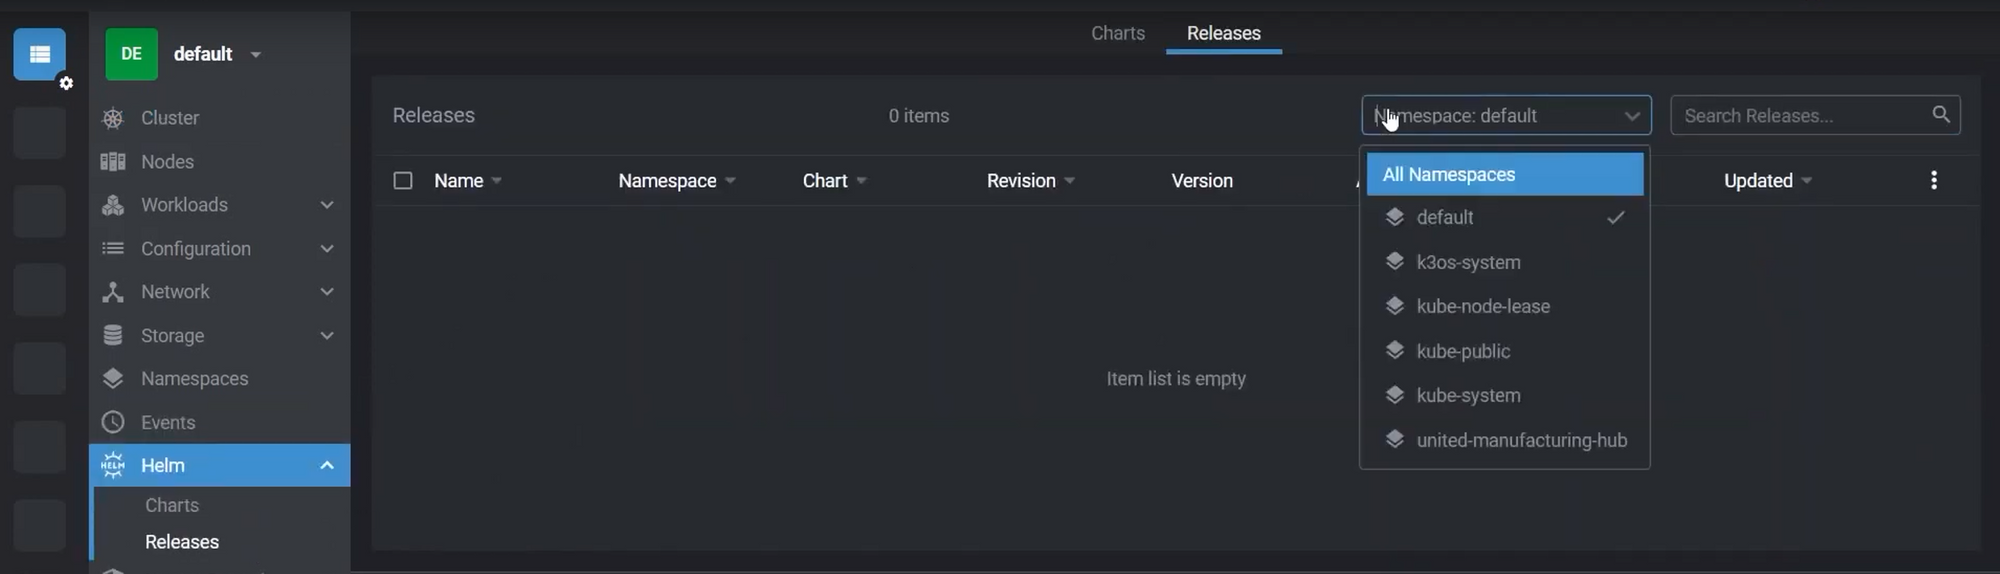
- Click on Helm -> Releases and change the namespace from default to united-manufacturing-hub in the upper right corner
- Click on the Release united-manufacturing-hub to be able to inspect the values.yaml file, which holds the configurations of all microservices used in the cluster.
Please note: There’s a bug in OpenLens version 6 that doesn’t load the helm chart. Please refer to this if you have any problem - Make sure the iprange in sensorconnect of the values.yaml is set to be in the same subnet (first 3 numbers of the IP range) as the edge PCs IP. So for example 192.168.10.24 if the Edge PC IP is 192.168.10.1
- Click Save. Congratulations! You have installed the United Manufacturing Hub!