


Node-RED is an open-source flow-based programming tool that provides an easy-to-use graphical interface for developing applications. Sometimes, you may encounter a missing plugin when deploying your flow, which can prevent you from deploying the flow properly. In this guide, we will provide step-by-step instructions on how to get missing plugins in Node-RED.
Instructions
- Open Node-RED in your web browser.
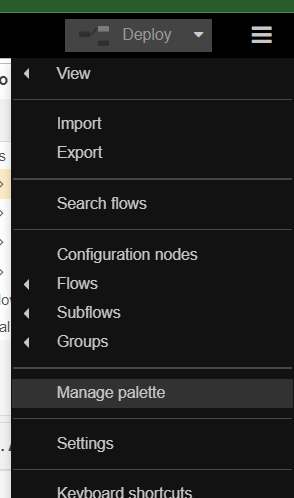
- Click on the "Menu" button in the upper right-hand corner of the screen.
- Select "Manage palette" from the drop-down menu.
- In the "Manage palette" menu, select the "Install" tab.
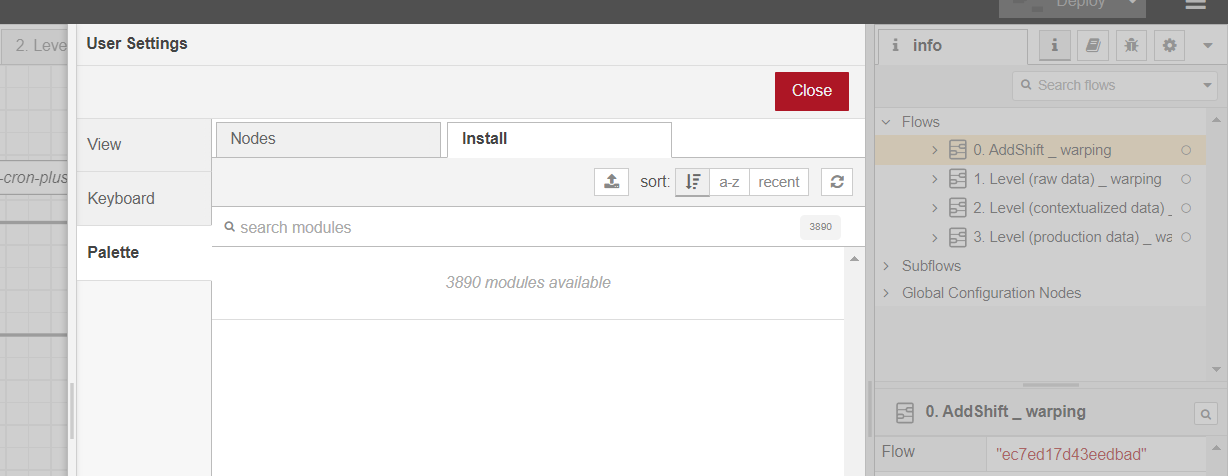
- Use the search bar to find the missing plugin/node that you need to install.
- Select the correct plugin/node from the list of search results.
- Click on the "Install" button next to the plugin/node to install it.
- Wait for the installation to complete.
- Once the installation is complete, close the "Manage palette" menu by clicking on the "Close" button.
The missing plugin/node should now be available for use in your flow.
ℹ️
If the installation takes too long or does not work, you can refer to the article "How to install New Nodes/Plugins?" for more information on installing plugins in Node-RED.


