For more information on the shared value proposition and the use-case please check out also our blog article
Prerequisites
- An active Tulip subscription.
- The UMH platform installed and configured.
- Available data extracted from sensors, industrial controllers or other shopfloor IT systems and available in the MQTT broker or Apache Kafka.
About Tulip
Tulip is a frontline operations platform, which is deployed in manufacturing and logistic environments, bridging the interaction between people, machines, devices, and systems.
Tulip’s most widely documented use case (in different and extensive channels such as “Tulip Libraries”, “Tulip University” and “Tulip Community”) focuses on their hardware “I/O Gateway” and “Edge IO” developed for the deployment of work instructions running in the Tulip Cloud. These work instructions can be authorized with additional hardware that connects Tulip approved devices via USB port and sensors to GPIO ports. The main function of the gateway is to send the data to the Tulip app.
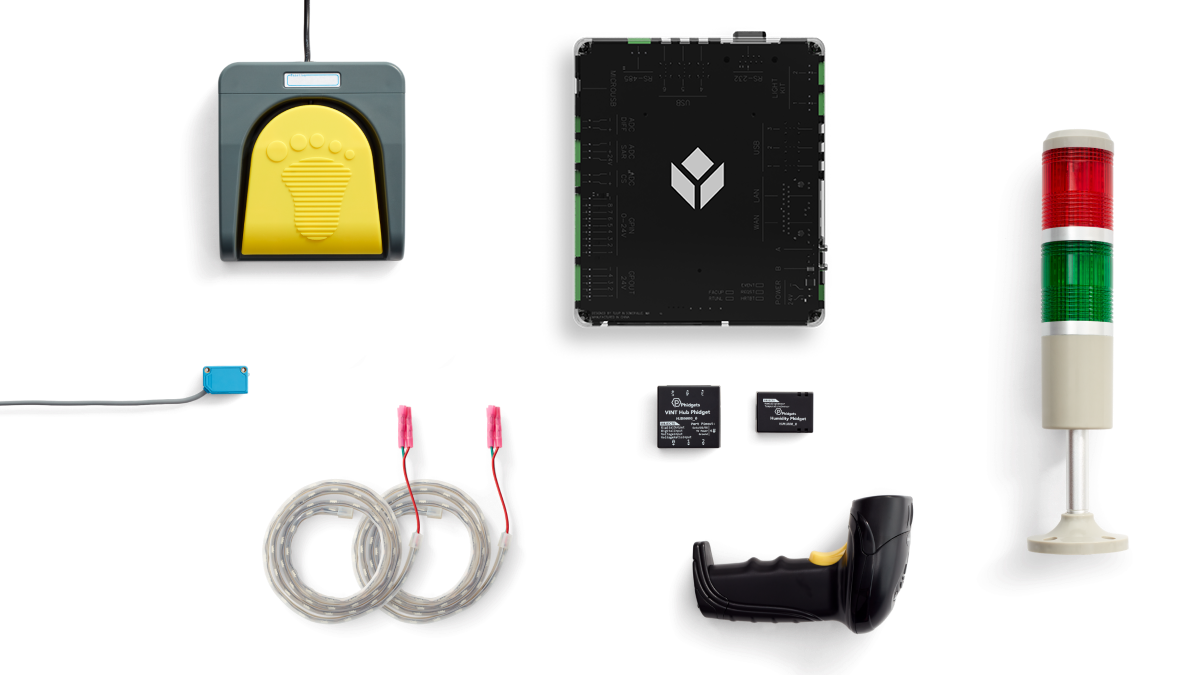
Within the Tulip platform, users can create applications using a no-code interface. The operations are triggered by various sensors and forwarded by the hardware to the Tulip Cloud.
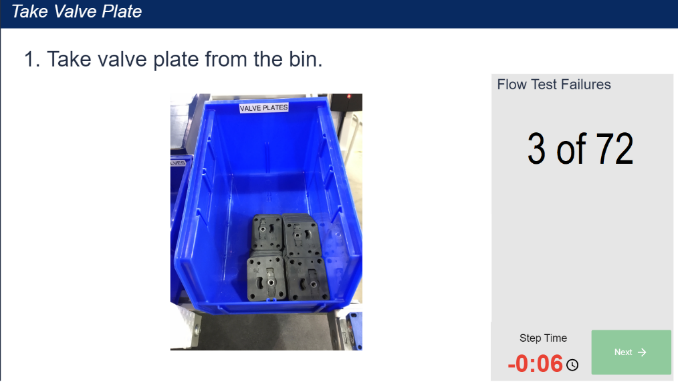
In addition to apps, users can create “Tulip Analyses” to monitor KPIs and trends and provide insights to the production team. Interactive dashboards can also be created to monitor KPIs of interest.
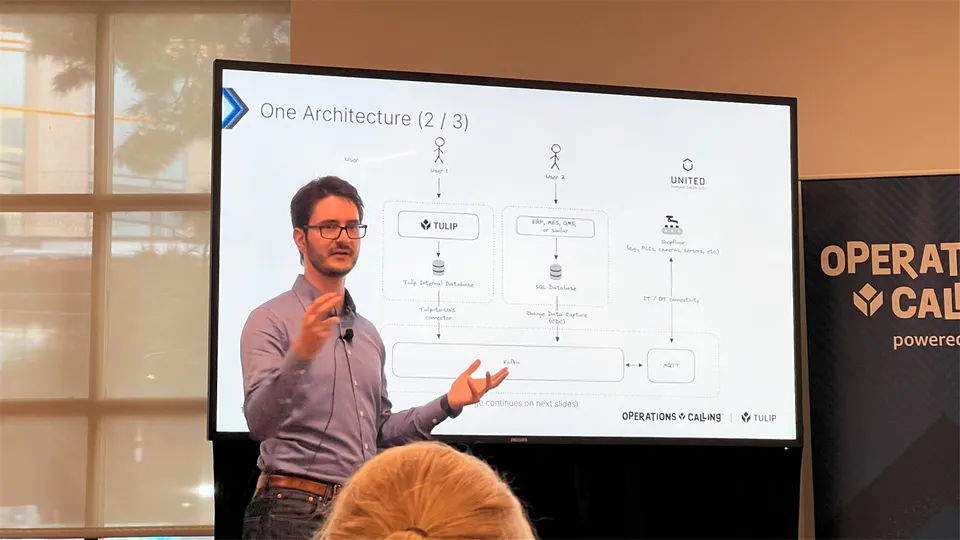
The United Manufacturing Hub (UMH) provides the necessary IT/OT infrastructure not only to connect real-time manufacturing data to Tulip, but to also share it with other solutions and applications. For example, data coming from sensors, barcode readers, cameras and industrial controllers can now be used for real-time stream or batch processing by other use cases such as predictive maintenance, quality management systems, track & trace / digital shadow, and supervisor dashboards. These use cases can then run different clouds such as AWS or Azure.
Additionally, this allows for adding data sources to Tulip that are yet to be officially supported (e.g., IO-Link sensors). To access local data sources, a Tulip Connector Host and/or opening ports are no longer required, which should align with the IT security department’s requirements.
Approach
In this tutorial we will choose the “Tulip Machine Attributes API” approach. Another method is using the Tulip Connector Host. The approach chosen here has the advantage that it does not require opening ports and is therefore more easily integrated into enterprise IT.
Step-by-step tutorial
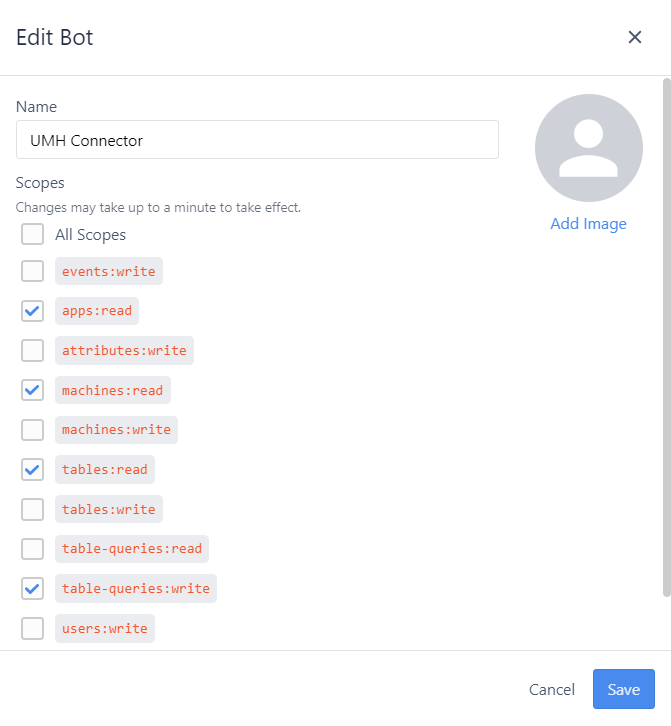
Perform the following steps as a Tulip administrator. First, in the Tulip platform, go to your profile icon and click Settings. Then select the Bot tab and create one. For this project, only data should be read and displayed in the Tulip environment, therefore the scope must be set to “read-only”.
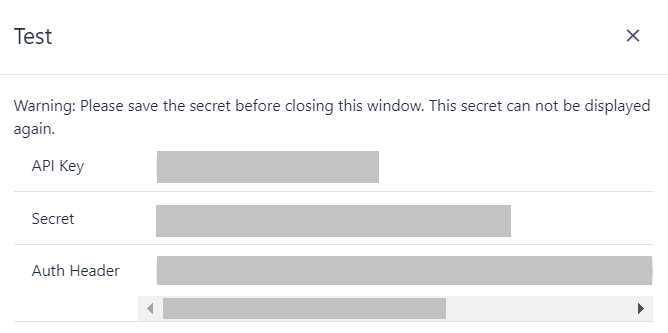
The API Key, Secret and Auth Header are displayed. Please store this information in a safe place.
Then you will need to link this Machine API to a Machine.
1. Create a Machine Type
Navigate to the tab “Shopfloor” –> “Machines” then change to the tab “Machine Types”. Here, click on the button “Create type”. For now, only change the name of the machine type.
2. Create a machine
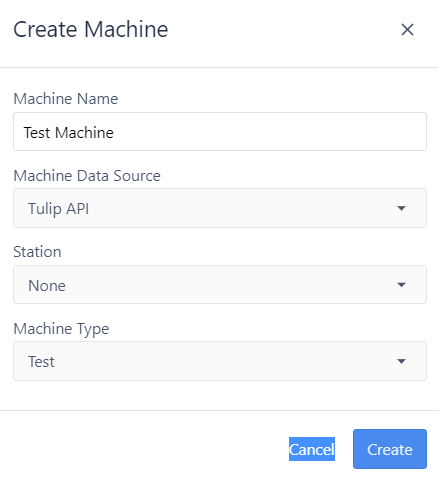
Go to the Machine Library tab and click the Create Machine button. Assign a name to your machine. Then select Tulip API as the data source. The Tulip interface will ask you to assign your machine to a station. If multiple stations use the data, we recommend selecting “None”. Finally, select the machine type you just created.
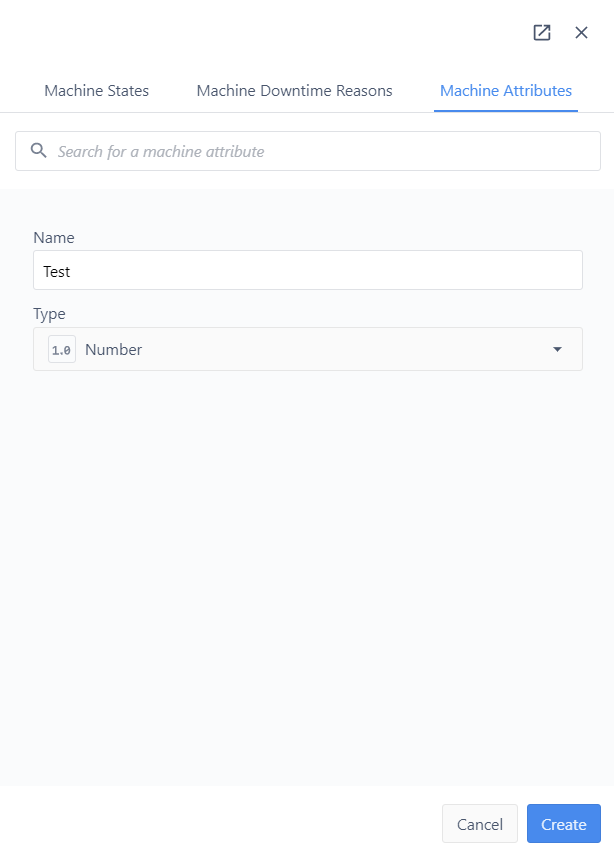
3. Add Machine Attribute
Return to the Machine Type tab and navigate to the Machine Type you previously created. Click the edit button and scroll down and head to “Add Machine Attribute”.
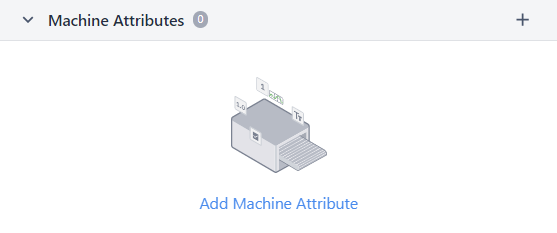
Here you are able to create new machine attributes or assign ones you created and used before.
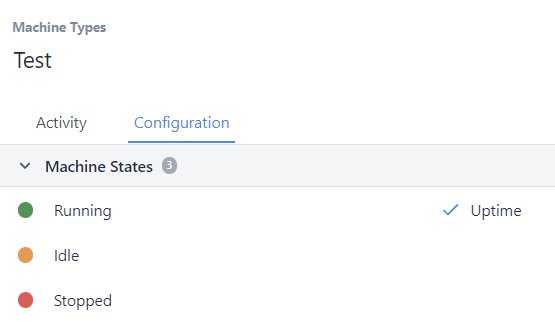
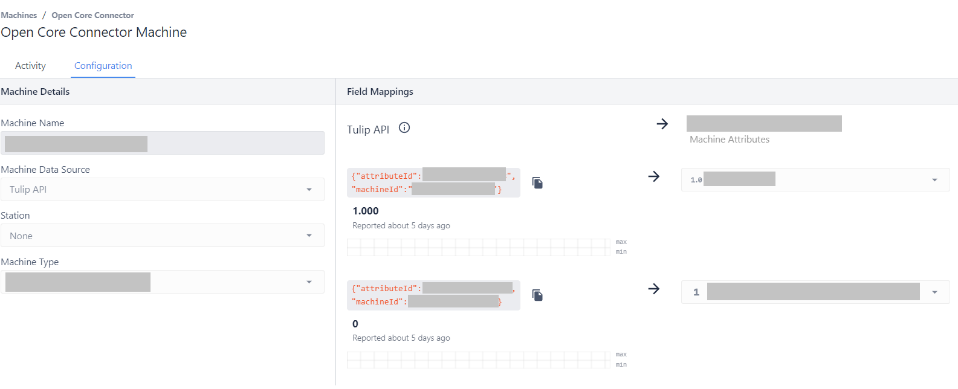
Having performed the previous steps, you are now able to to find the field mappings for each Machine Attribute. Go to the tab “Shopfloor/Machines”, select the machine name of interest, and click on the Configuration tab. There you’ll discover field mappings for each Machine Attributes. The “Attibute ID” and “Machine ID” will be used for setting up the connection in Node-RED.
Having performed the previous steps, the Tulip configuration is finalized. The next part of the article describes the configuration in Node-RED that is necessary for connecting the data acquisition layer performed in Node-RED with the Tulip platform.
4. Connecting to the Tulip Machines Attributes API using Node-RED
In the manufacturer’s environment, UMH installed an electrical cabinet (E-rack) with an Industrial PC (IPC). The IPC was connected to the industrial controller of the machine and reads several data tags such as power time, hydraulic pump time and power consumption, with a flow in Node-RED (see also the blog article mentioned at the beginning of the article)

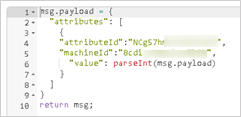
To connect to the Tulip Machine Attributes API, two nodes were used, namely a function node and a HTTP response.

For the function node, the message must contain the “Attribute ID” and “Machine ID” corresponding to the data tag being acquired from the industrial controller.
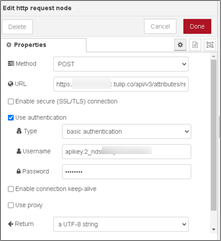
For the HTTP response node, a configuration with the Tulip platform is required. This information was acquired while creating the bot in the Tulip environment.
Having set everything up, the connection between the Node-RED flow and the Tulip platform is now established. On the next and final part of the blog, it will be shown how to use the data for developing it in the Tulip app environment.
5. Using the data in Tulip app
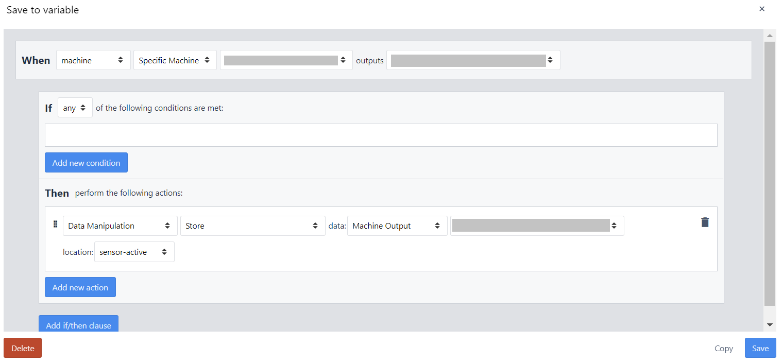
Data coming from industrial controllers or sensors can be connected, leveraging the Machine Attribute created as any other Tulip device. For this, please navigate to the “Apps” tab and create a new app or select one you already created.

The trigger menu will appear, and by selecting: When – Machine – Specific Machine The Machine that was created in the previous steps will appear. Select it and in the outputs, select the corresponding Machine attributes. Select the one that concerns you and by doing so you can leverage the data extracted from the machine.
Summary
This approach makes it possible to connect additional data sources to Tulip and combine Tulip with a Unified Namespace. It also reduces implementation time by eliminating the need to open ports in the corporate firewall.
Interested? Then check out also the corresponding blog article