How to create a Node-RED flow with simulated PackML data
Learn how to set up Node-RED flows to monitor a simulated production line's state, machine processing speed, and production counts using MQTT and UMH data model conversion.
Instructions
-
Connect to Node-RED using UMHLens and create a new flow.

-
Drag the following nodes into your flow: mqtt-in→filter→json→switch→function(10x)→mqtt-out.

-
Open the filter-node and set it to block unless value changes.

-
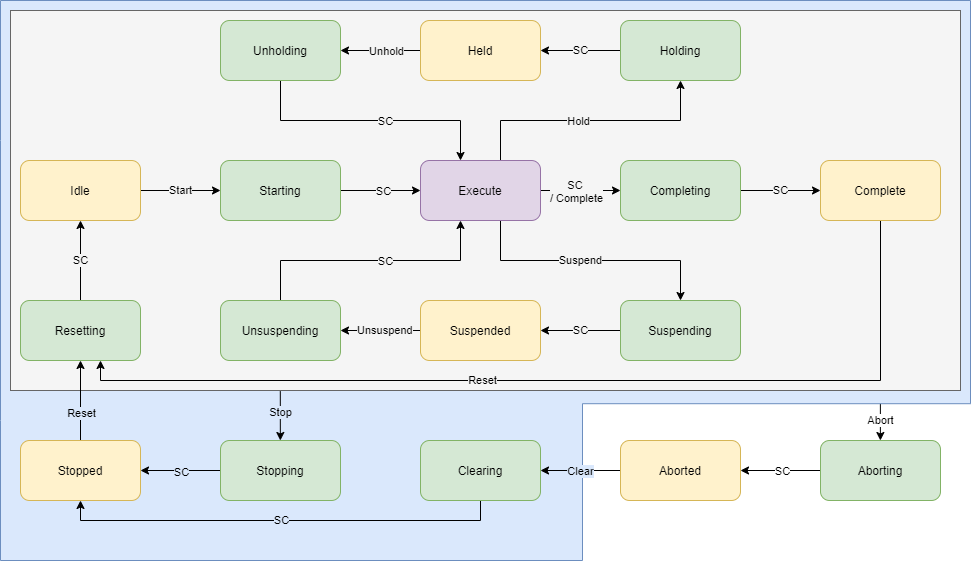
Open the switch-node and configure it as shown below. The switch node will check if the incoming message has one of the values we’ve configured and pass it to the correct function-node.

-
Now connect all nodes.

-
Next configure the 10 function-nodes, which will convert the incoming message (Pack-ML state) into the UMH state. If you want to see all UMH states click here. Paste in the following code for each function-node starting from top→bottom.
msg.payload = {"state":40000, "timestamp_ms":Date.now()}
return msg;
msg.payload = {"state":40000, "timestamp_ms":Date.now()} return msg;msg.payload = {"state":90000, "timestamp_ms":Date.now()} return msg;msg.payload = { "state":10000, "timestamp_ms":Date.now()} return msg;msg.payload = {"state":20000, "timestamp_ms":Date.now()} return msg;msg.payload = {"state":220000, "timestamp_ms":Date.now()} return msg;msg.payload = {"state":20000, "timestamp_ms":Date.now()} return msg;msg.payload = {"state":20000, "timestamp_ms":Date.now()} return msg;msg.payload = {"state":20000, "timestamp_ms":Date.now()} return msg; -
Configure the mqtt-in node with the servicename of hivemq and the topic
testLocation/DefaultArea/DefaultProductionLine/Status/StateCurrent. -
For the mqtt-out node, select the created broker and use the topic
ia/factoryinsight/Aachen/testAsset/state

-
The next set of nodes will return the speed at which the machine is operating. Drag the following nodes into your flow: mqtt-in→json→function→mqtt-out. Configure the mqtt-in node with the topic
testLocation/DefaultArea/DefaultProductionLine/Status/CurMachSpeedand the mqtt-out node with the topicia/factoryinsight/aachen/maschine/processValue.

-
Next convert the current machine speed into a percentage number. Therefore, open the function node and paste in the following:
msg.payload = {                                //creating an object with key:value pairs
    "timestamp_ms":Date.now(),
    "CurrentState":parseFloat(msg.payload/102) //maximum speed is 102
}
return msg;
- Click deploy on the top right, and you are done with this set of nodes.
- The last set of nodes will count the good and defective produced products. Since this simulator already gives us the total number of defective and good products, we have to convert that, so that every time a product is produced (defective or good) we get a count signal. Import two mqtt-in, two json, three function, and one mqtt-out node into your flow.

- Paste this code into function1 → On Start. The code will be run once on start.
context.set("current", 0);
context.set("previous", 0);
- Paste this code into function1 → On Message. The code will be run when a new message appears.
context.set("previous", context.get("current"))
context.set("current", msg.payload)
msg.payload = {
    "count":parseInt(context.get("current")-context.get("previous"))
}
return msg;
- Now repeat these two steps for function2. Code for function2 → On Start:
context.set("scrapcurrent", 0);
context.set("scrapprevious", 0);
- Code for function2 → On Message:
context.set("scrapprevious", context.get("scrapcurrent"));
context.set("scrapcurrent", msg.payload);
msg.payload = {
    "scrap":parseInt(context.get("scrapcurrent")-context.get("scrapprevious"))
}
return msg;
- For function3 you only need to paste code into On Message:
msg.payload = {
    "timestamp_ms":Date.now(),
    "count":parseInt(msg.payload.count ? msg.payload.count : 0),
    "scrap":parseInt(msg.payload.scrap ? msg.payload.scrap : 0),

}
msg.topic = "ia/factoryinsight/aachen/mach/count"; //mqtt-out topic
return msg;
- Since we already specified our mqtt-out topic in the last function node, we only need to configure our mqtt in nodes, with the upper one having the topic:
testLocation/DefaultArea/DefaultProductionLine/Admin/ProdProcessedCount/0/Countand the lower one:testLocation/DefaultArea/DefaultProductionLine/Admin/ProdDefectiveCount/0/Count.To make our changes effective, open the mqtt-out node and click done. Finally click deploy. - If you want to display your created data, make sure to check out our guides fo Grafana. This flow will look something like this in Grafana:


