

"Connecting my SQL database to the Unified Namespace (UNS) seems like rocket science!" This concern came to our attention recently. Most guides out there make the process seem challenging. But we're here to assure you - it's not as complicated as it sounds, especially with the right tools. Tools like the United Manufacturing Hub (UMH) and Debezium can simplify the process significantly. So, let's dive in and demystify this process.
Understanding the Need
Before we get into the 'how', let's explore the 'why'. Why do we need to connect a database with the UNS? We often get this question, and here's our two-fold response:
- Connection to Data Warehouses through ETL: By linking your existing "OLTP" databases (also known as databases used on the factory floor) to your data warehouse or data lake, you ensure a smooth flow of data. This synchronization is possible through an ETL process, which we have previously outlined.
- Connecting legacy equipment: If you have factory floor equipment that doesn't use standard data transfer protocols like OPC-UA or Modbus, you can still connect these to the UNS. However, the catch is that the equipment must use a Debezium supported database.
With these reasons in mind, it's time to tackle the actual process of making this connection.
The Process - Step by Step
This might seem like a daunting task, but we'll guide you through the process. You'll be surprised how simple it can be, especially with the TimescaleDB database included in the UMH.
Step 1: Setting Up Your Environment & Preparing PostgreSQL
Start by installing the UMH using the Management Console on your local laptop (or on any VM or edge device). Next, set the wal_level for the replica from hot_standby to logical in the Helm Chart under the value timescaledb. If you're connecting with an external Postgres database, such as your MES's, you'd need to adjust this parameter there.
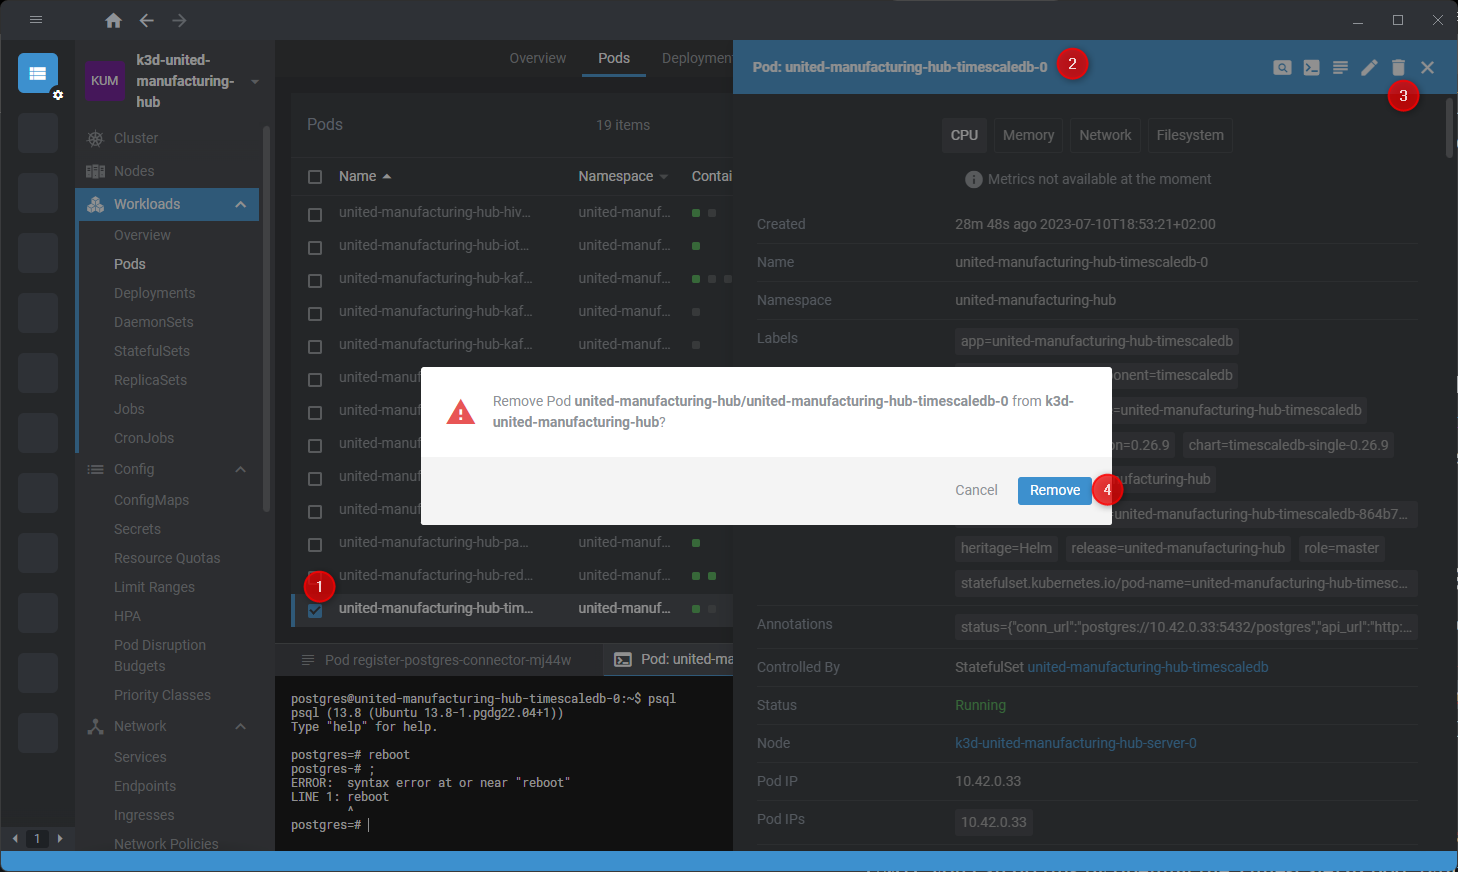
Creating a new user who can view all changes in your Postgres database is your next step. This can be done in the UMH by opening the TimescaleDB pod, typing psql, followed by \c factoryinsight and CREATE USER debezium WITH PASSWORD 'changeme' SUPERUSER;. Alternatively, you can also do this with an UI tool.
Step 2: Deploy Debezium
Deploying Debezium is easy if you're using the United Manufacturing Hub. You just need to copy-paste a provided text file into OpenLens / UMHLens (Video tutorial) to deploy Debezium into Kubernetes. This installs Debezium, and configures it to stream all changes of the table assettable to the topic ia.raw.timescaledb.factoryinsight.public.assettable.
Confused? Let's break it down.
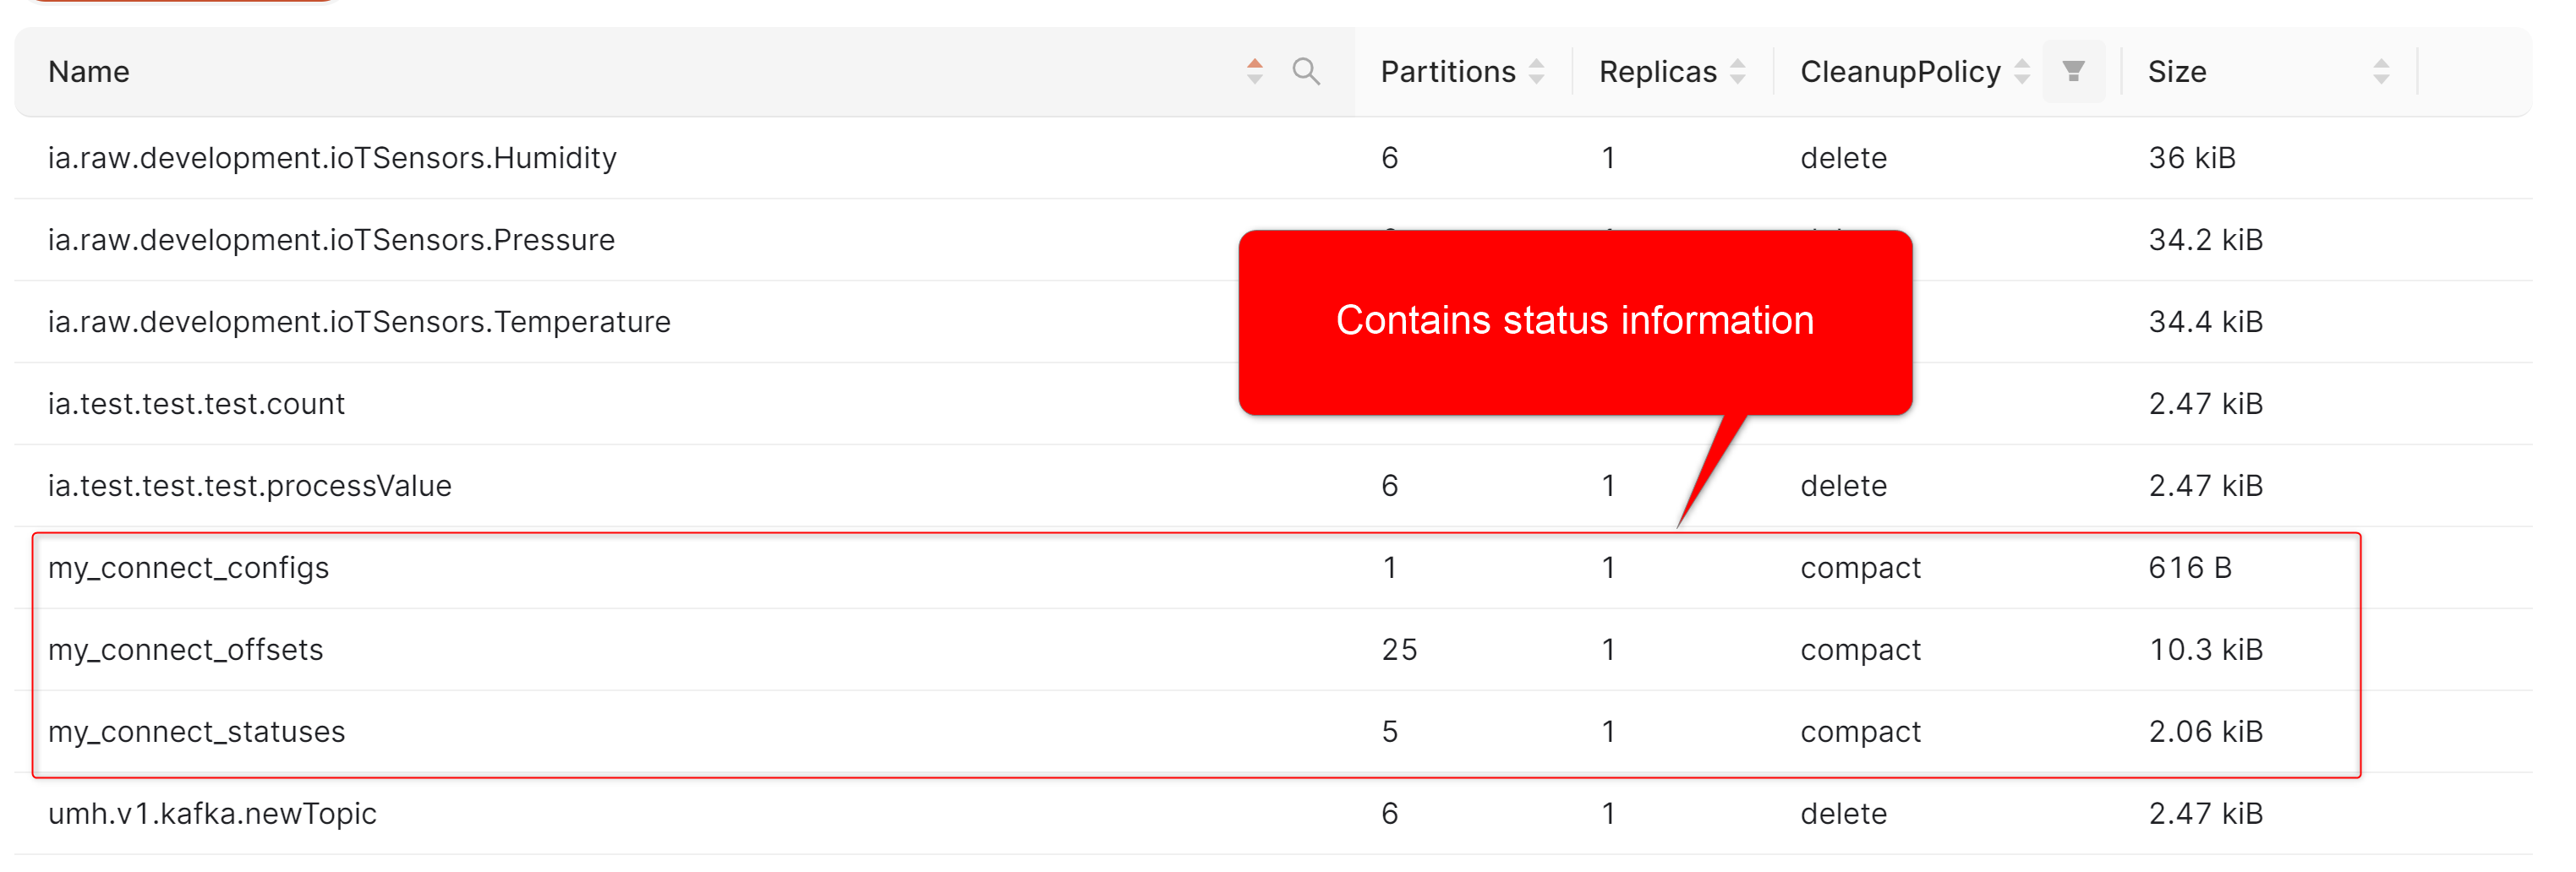
The text file instructs Kubernetes to set up four "components":
- A ConfigMap, which holds configuration settings. In this case, it houses a file named connector.json, which contains all the necessary information for connecting to the UMH internal PostgreSQL / TimescaleDB database.
- A Service, which makes Debezium accessible within the cluster via the URL "debezium-connect-service."
- A Job, which uses the configuration from the ConfigMap, connects to Debezium via the service, and pushes it into Debezium's REST API to set up the Connector.
- A Deployment, which instructs Kubernetes to launch a
debezium/connect:1.7container.
And that's all. Kubernetes and Debezium take care of the rest.
apiVersion: v1
kind: ConfigMap
metadata:
  name: postgres-connector-config
  namespace: united-manufacturing-hub
data:
  connector.json: |-
    {
      "name": "timescaledb-connector",
      "config": {
        "connector.class": "io.debezium.connector.postgresql.PostgresConnector",
        "database.hostname": "united-manufacturing-hub",
        "database.port": "5432",
        "database.user": "debezium",
        "database.password": "changeme",
        "database.dbname": "factoryinsight",
        "database.server.name": "ia.raw.timescaledb.factoryinsight",
        "table.include.list": "public.assettable",
        "plugin.name": "pgoutput"
      }
    }
---
apiVersion: v1
kind: Service
metadata:
  name: debezium-connect-service
  namespace: united-manufacturing-hub
spec:
  selector:
    app: debezium-connect
  ports:
    - protocol: TCP
      port: 8083
      targetPort: 8083
---
apiVersion: batch/v1
kind: Job
metadata:
  name: register-postgres-connector
  namespace: united-manufacturing-hub
spec:
  template:
    spec:
      restartPolicy: OnFailure
      containers:
      - name: register-postgres-connector
        image: curlimages/curl:7.77.0
        command:
        - "/bin/sh"
        - "-c"
        - |
          while ! curl -f http://debezium-connect-service:8083/connectors; do sleep 10; done
          curl -X POST -H "Content-Type: application/json" -d @/etc/debezium-connector-config/connector.json http://debezium-connect-service:8083/connectors
        volumeMounts:
        - name: debezium-connector-config
          mountPath: /etc/debezium-connector-config
      volumes:
      - name: debezium-connector-config
        configMap:
          name: postgres-connector-config
---
apiVersion: apps/v1
kind: Deployment
metadata:
  name: debezium-connect
  namespace: united-manufacturing-hub
spec:
  replicas: 1
  selector:
    matchLabels:
      app: debezium-connect
  template:
    metadata:
      labels:
        app: debezium-connect
    spec:
      containers:
      - name: debezium-connect
        image: debezium/connect:1.7
        env:
        - name: BOOTSTRAP_SERVERS
          value: "united-manufacturing-hub-kafka:9092"
        - name: GROUP_ID
          value: "debezium-postgres"
        - name: CONFIG_STORAGE_TOPIC
          value: "my_connect_configs"
        - name: OFFSET_STORAGE_TOPIC
          value: "my_connect_offsets"
        - name: STATUS_STORAGE_TOPIC
          value: "my_connect_statuses"
        ports:
        - containerPort: 8083
      volumes:
      - name: debezium-connector-config
        configMap:
          name: postgres-connector-config
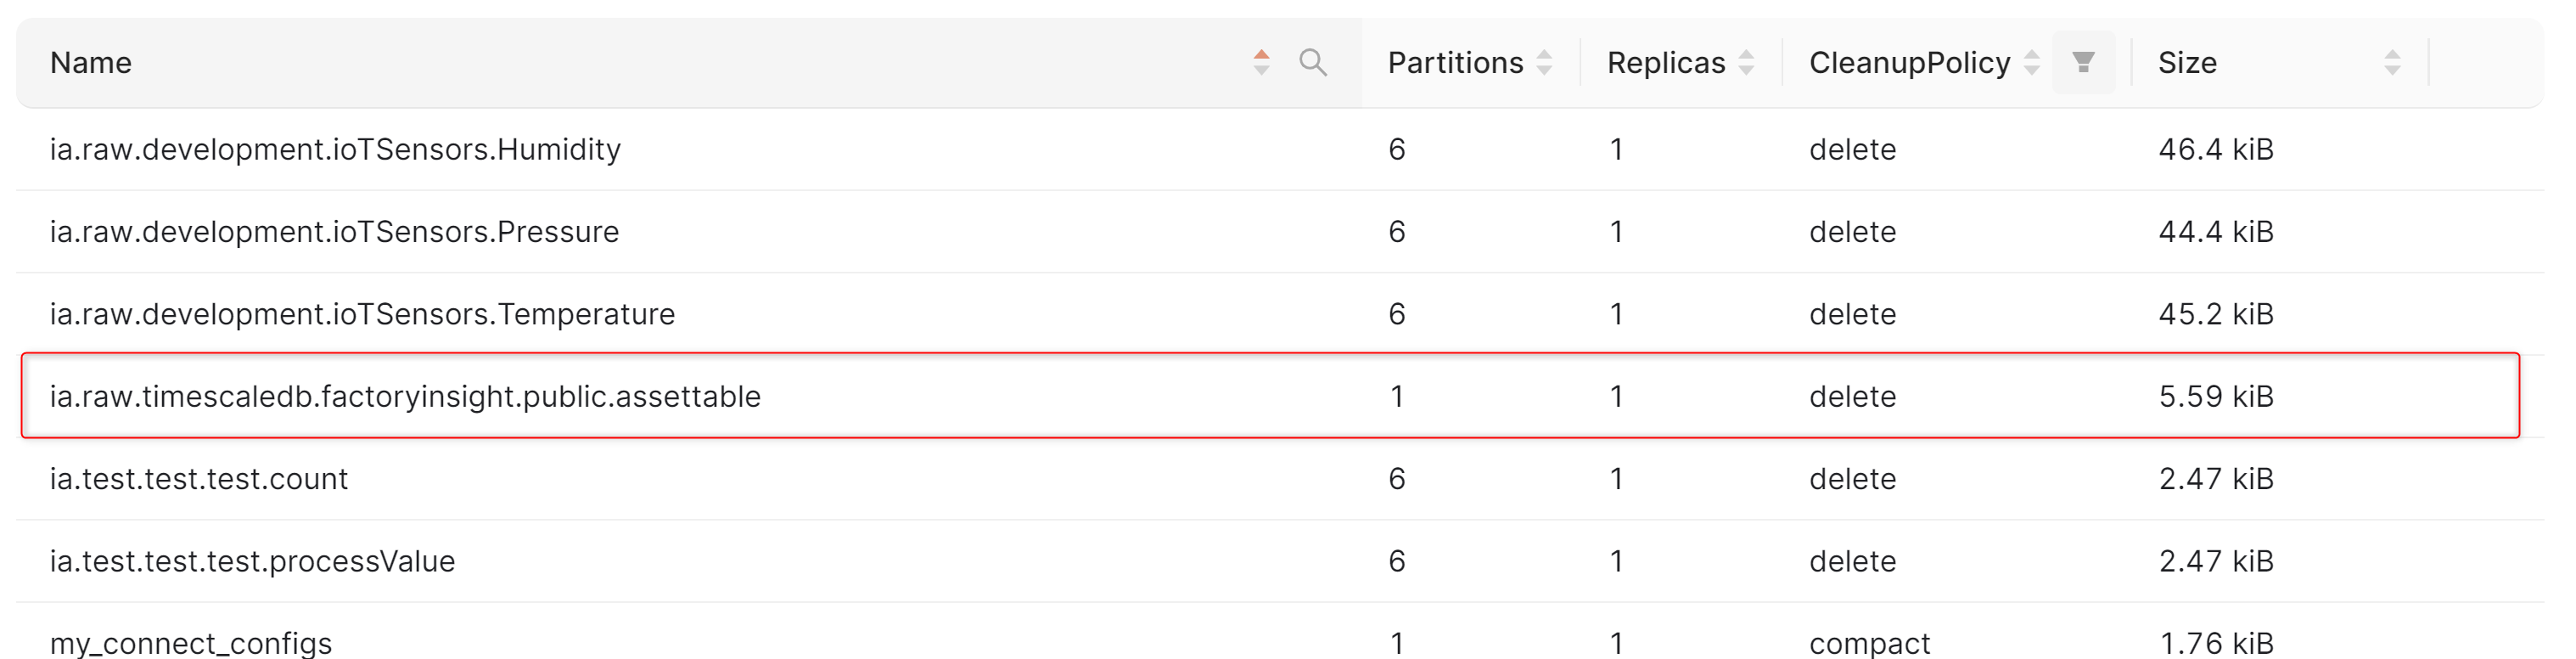
Step 3: Watch Your Data Come to Life in the UNS
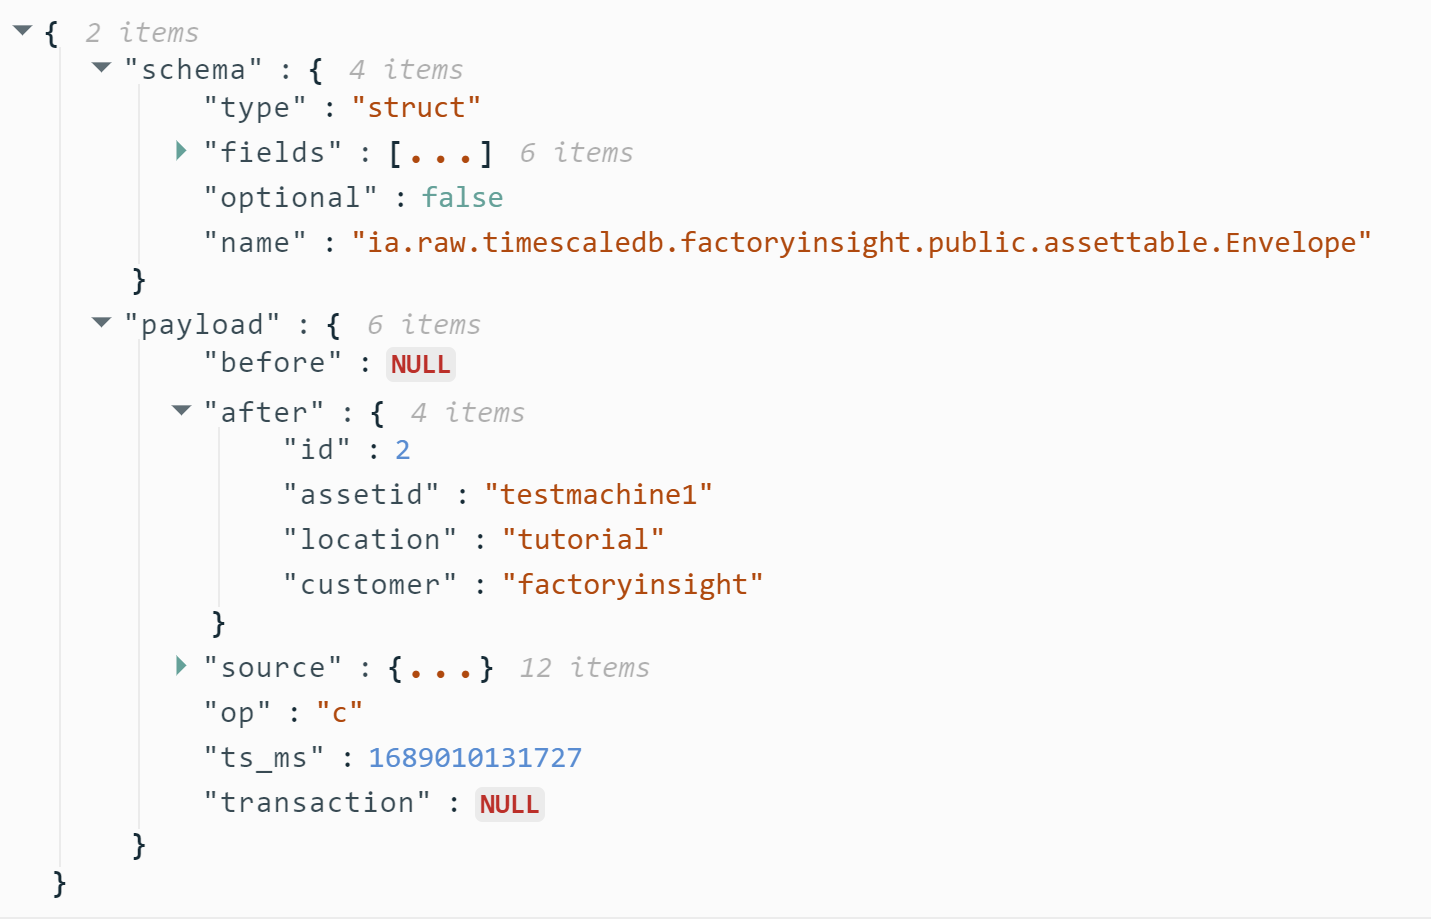
Wait around 5 minutes for everything to set up. After this, you should be able to see your data in the Kafka topic ia.raw.timescaledb.factoryinsight.public.assettable. pen the Redpanda Console (included in the United Manufacturing Hub and accessible via HTTP on port 8090) and select the topic.
Accessing the Redpanda Console (recommended method)
- Open your web browser.
- Enter either localhost:8090 or <IP>:8090 in the address bar.
- The Redpanda Console will open.
Accessing the Redpanda Console (port-forwarding method)
- Open UMHLens / OpenLens.
- Navigate to services --> united-manufacturing-hub-console.
- Go to ports and click on port forward (see this tutorial for further guidance)
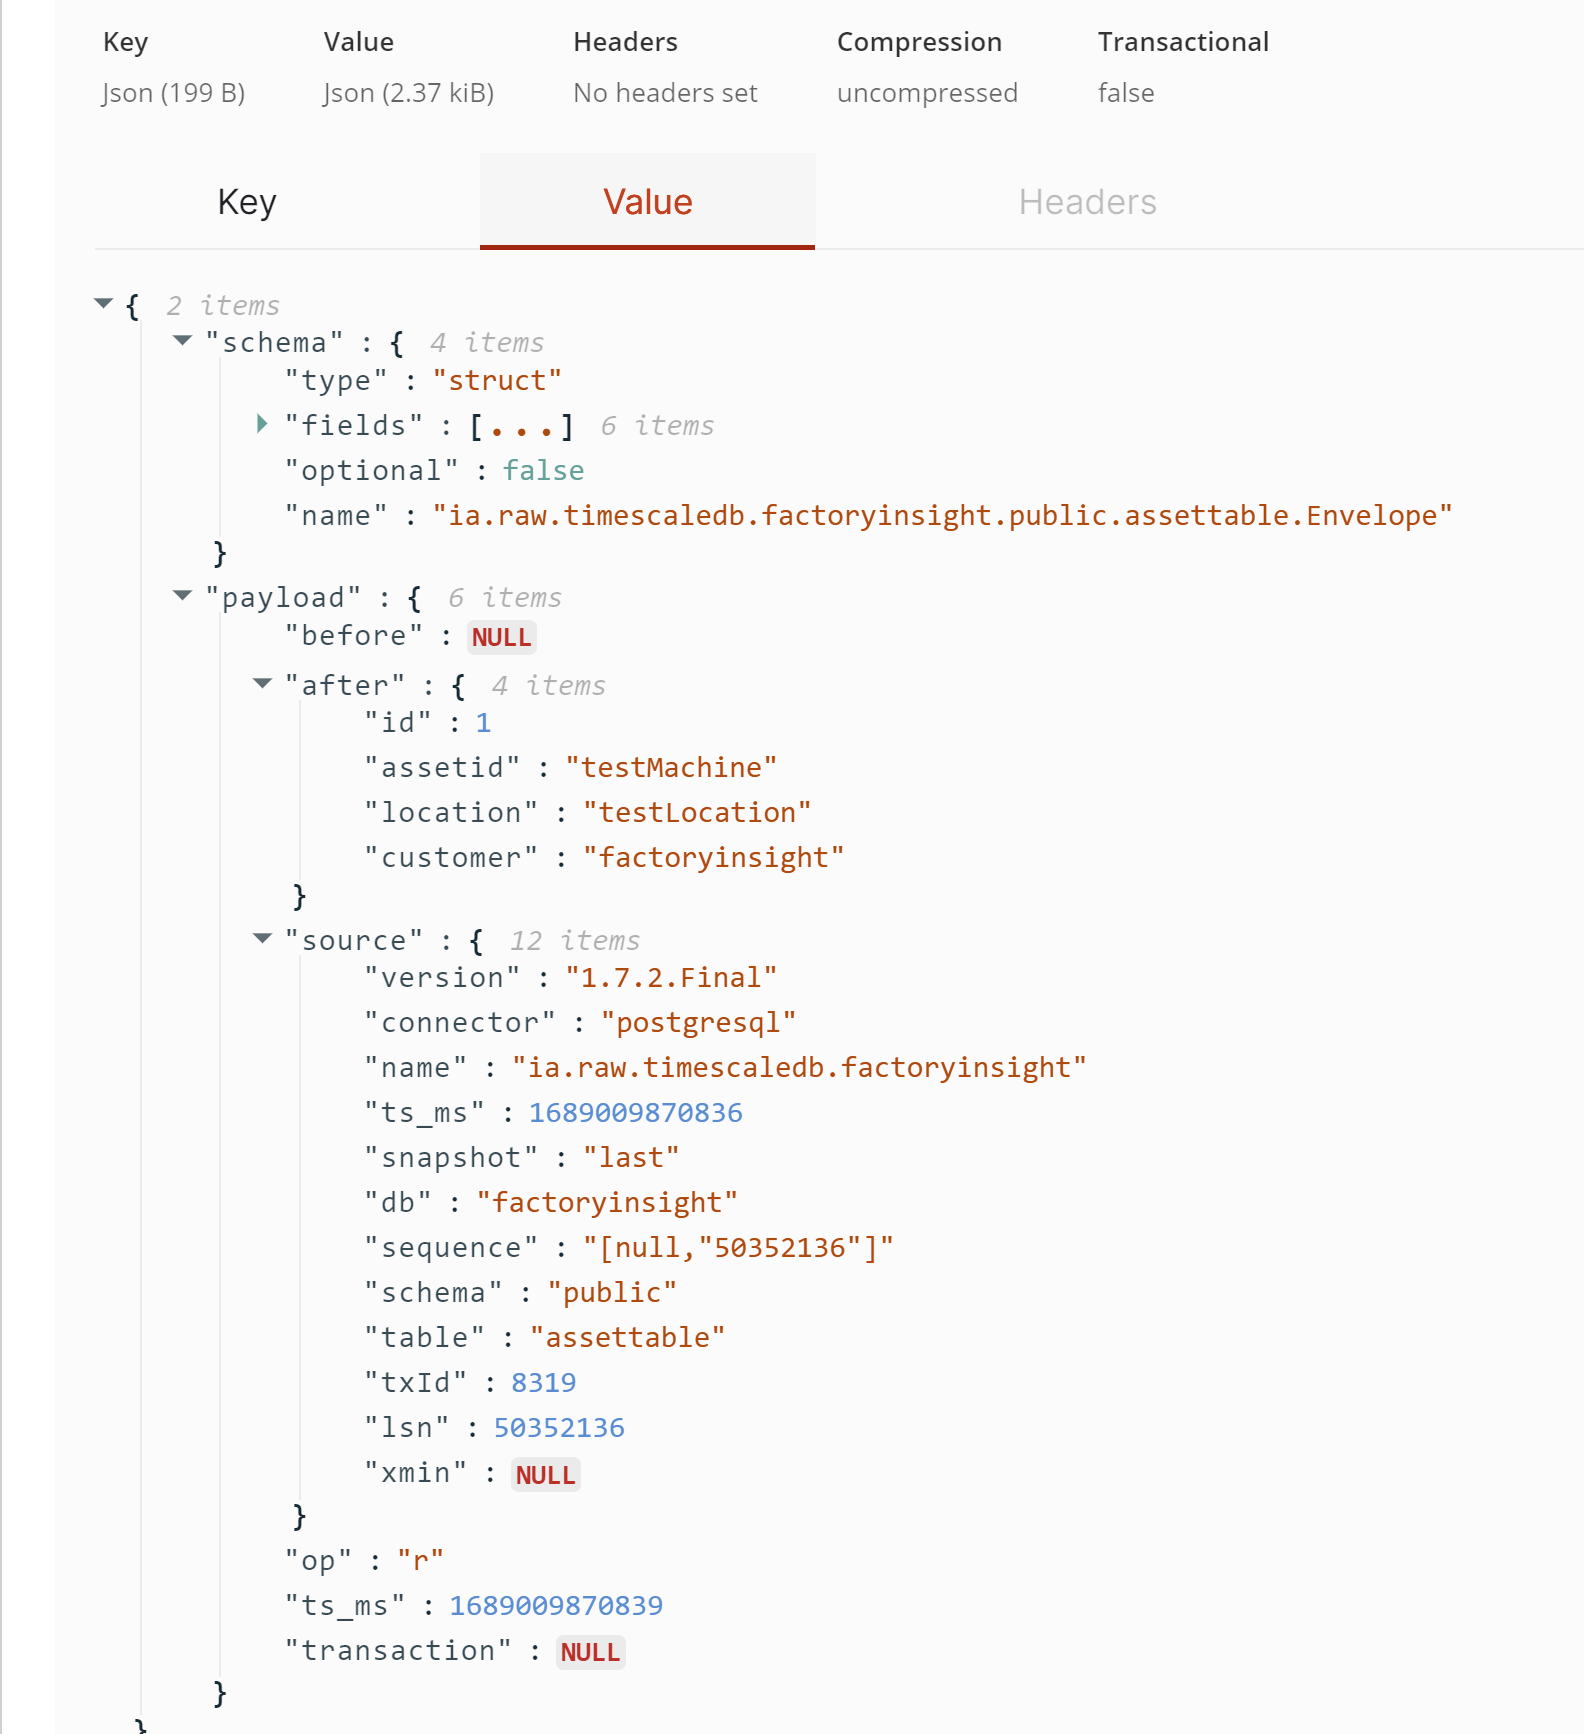
Conclusively, once everything is configured and running smoothly, Debezium will continue to listen for changes in your PostgreSQL / TimescaleDB database and generate change events. It will publish these to the associated Kafka topics for use in your data processing pipelines, enriching your data streams with minimal configuration and intervention.
In the UMH setup, change events are also sent to MQTT by default, enhancing data visibility. This means you can open any MQTT-based tool, like Node-RED or MQTT Explorer, to view the data in a more user-friendly environment. This can be helpful for users who are more familiar with MQTT or prefer its interface over Kafka's.
Step 4: Forcing New Events
If you want to manually generate a new change event, you can do so by sending a valid message for a new asset. For example, you can create a new topic like ia.factoryinsight.tutorial.testmachine1.processValue.temperature in the Redpanda Console. If you're using MQTT, remember to replace periods (.) with slashes (/).
Then, you can send a new message into the topic. An example message could look like this: {"timestamp_ms": 123, "test": 123}. This would force a new change event in TimescaleDB, allowing you to simulate changes and verify that your setup is functioning as expected.
Summary
Contrary to the initial concern we mentioned, connecting your SQL database to the UNS is far from rocket science. We hope this guide clarifies that. With the UMH and Debezium, it's a straightforward process that takes less than 20 minutes. Why not give the UMH a try and experience the ease of connecting your databases to the UNS?


