


💡
This is now also available as a YouTube tutorial!
Utilizing a hypervisor like Proxmox is not only beneficial for testing but is also a recommended way of installing the United Manufacturing Hub (UMH) on an on-premise virtual machine (VM) for production environments. In this tutorial, you'll learn how to set up the United Manufacturing Hub with Flatcar on Proxmox, which includes some specific configurations unique to this platform.
Creation
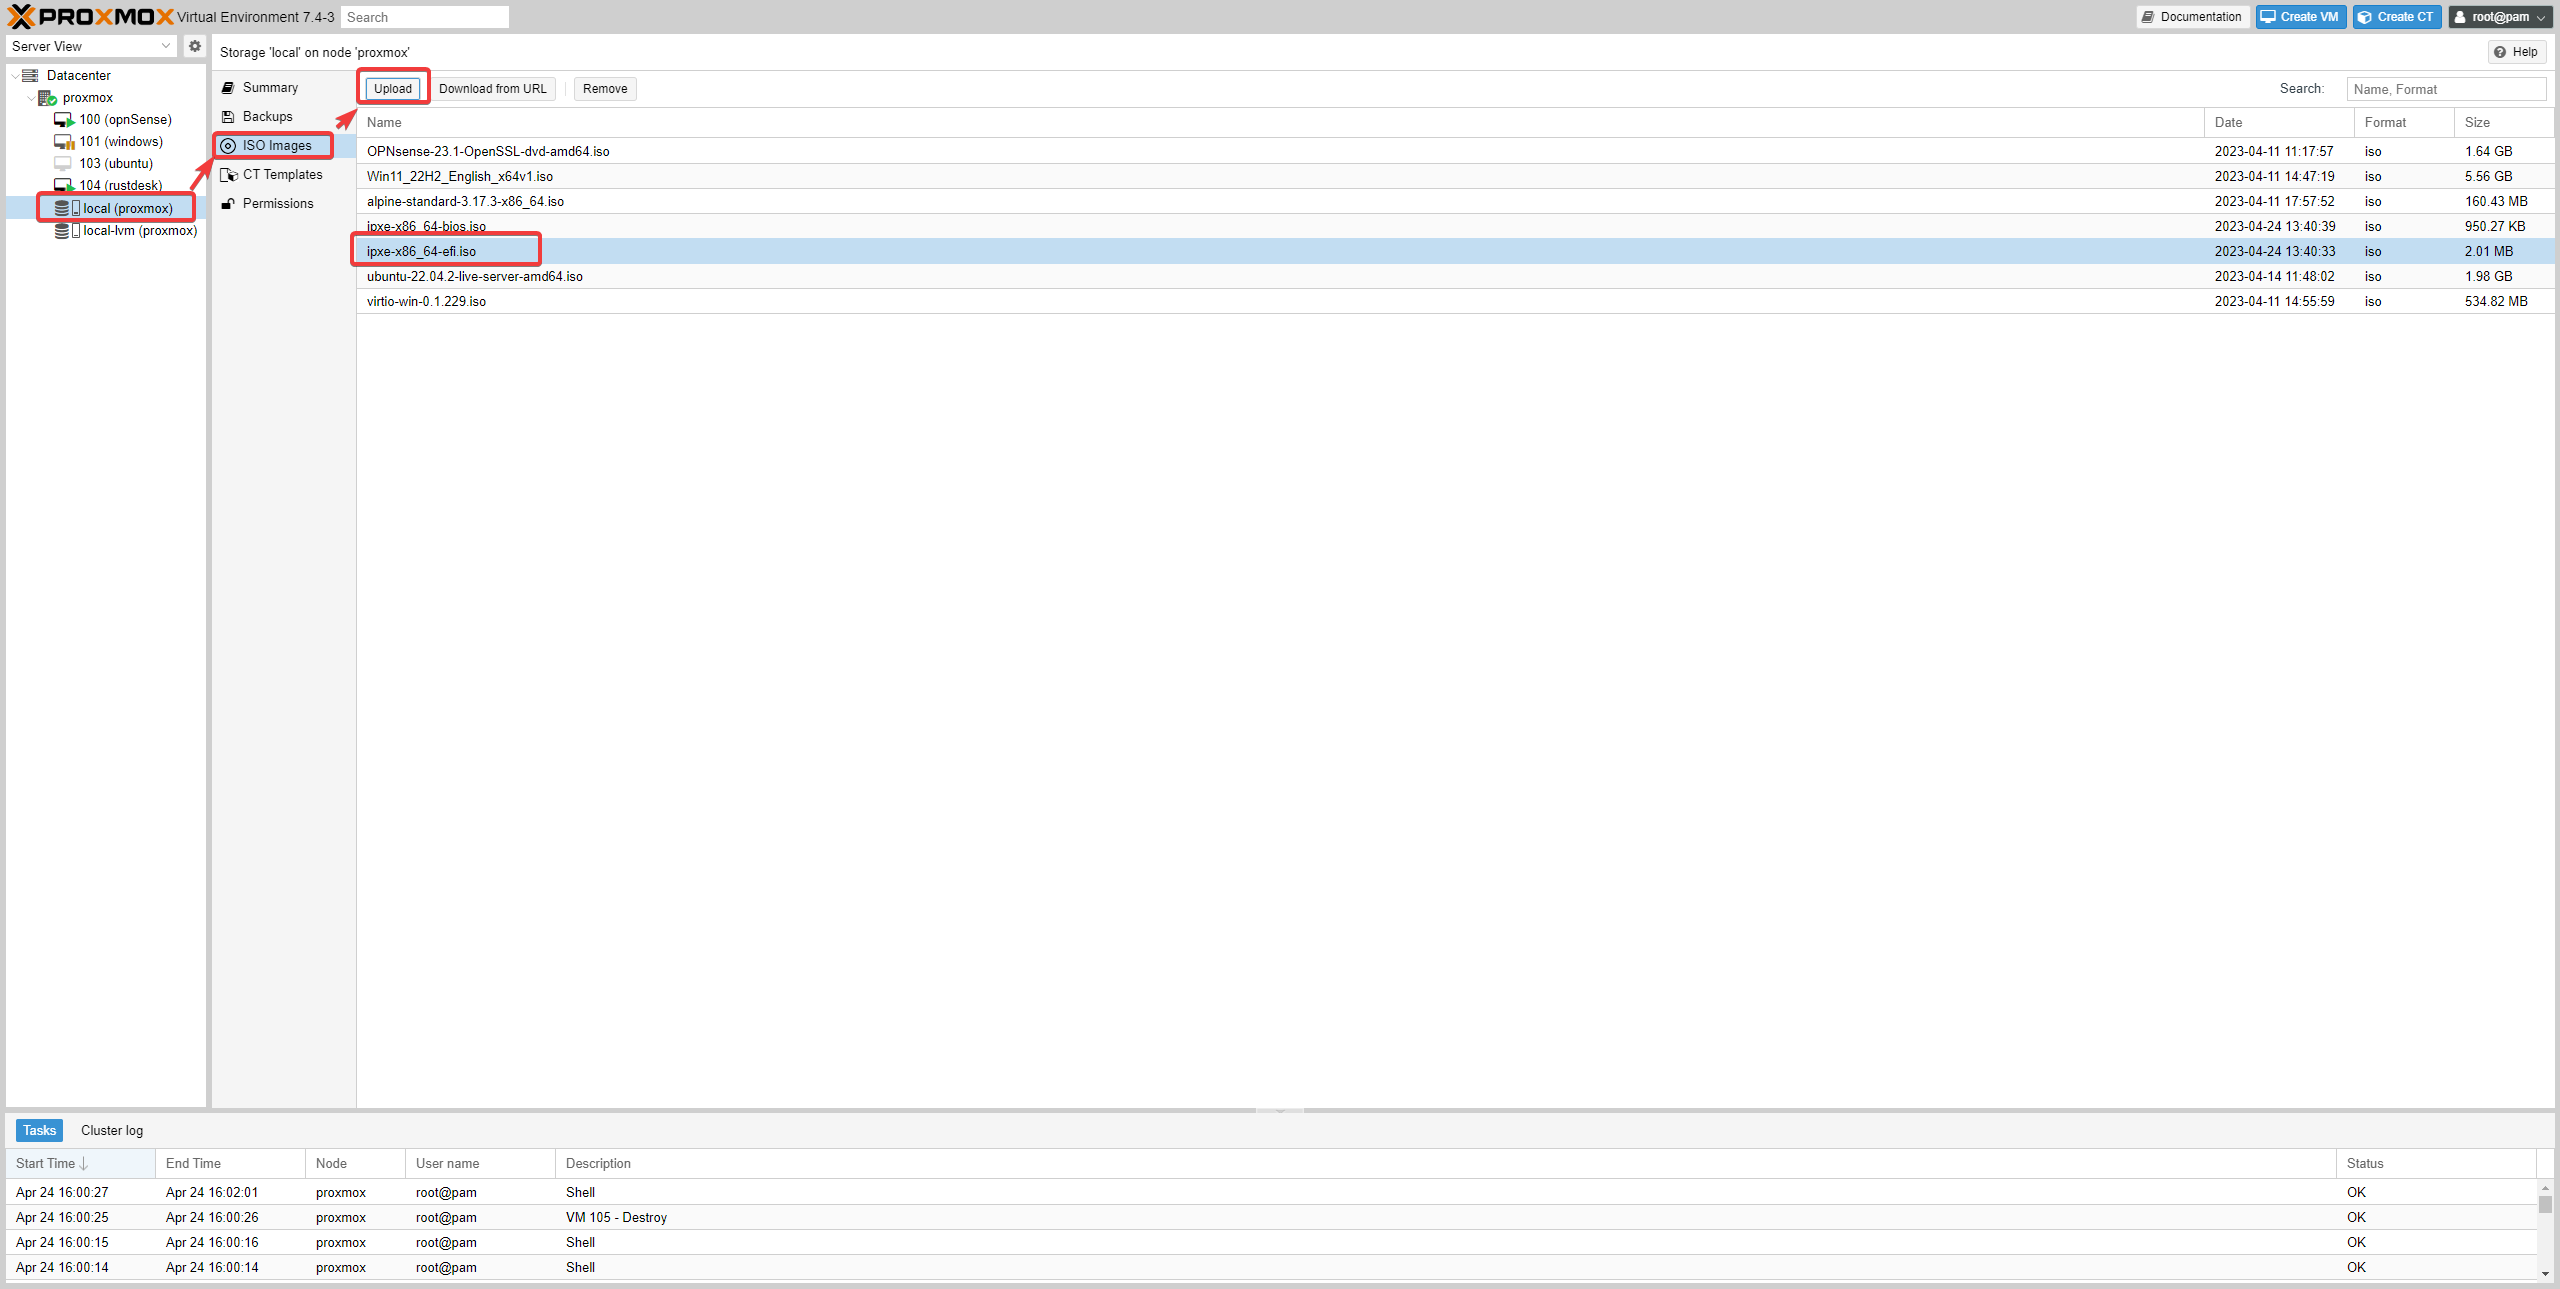
- Download the x86_64-efi.iso version of our latest release
- Open your proxmox and click on the left side on local(proxmox) -> ISO images -> upload and upload the iso image to your proxmox storage.
- Click Create VM.
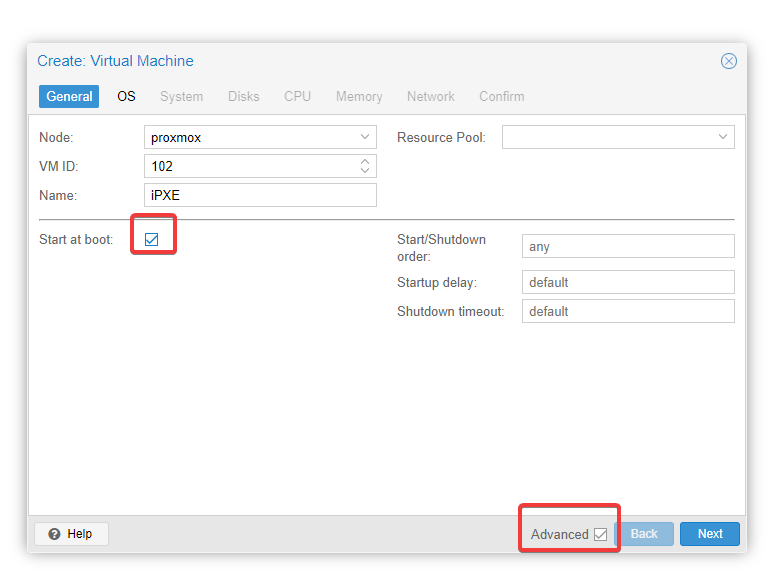
- Ensure Start at boot and Advanced are selected.
💡
You can leave the VM ID unchanged, but if you do make sure it is unique.
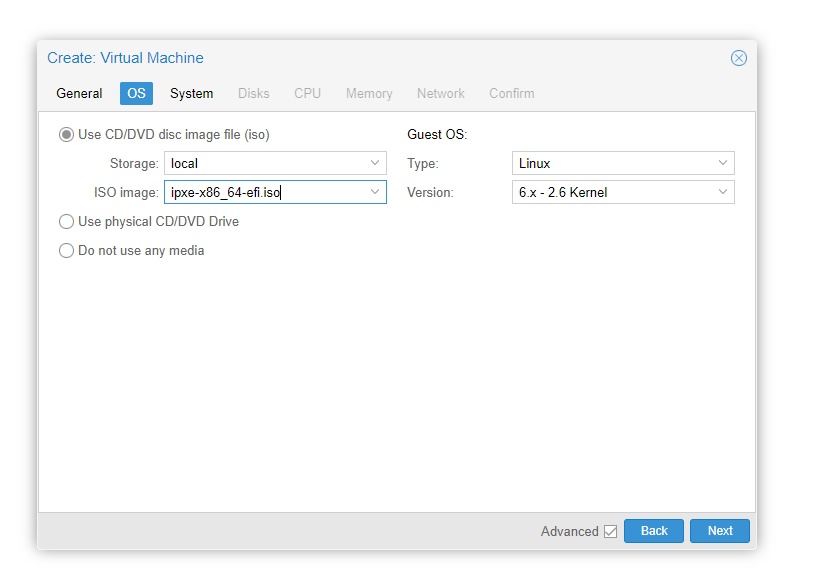
- Select the ipxe-x86_64-efi.iso image.
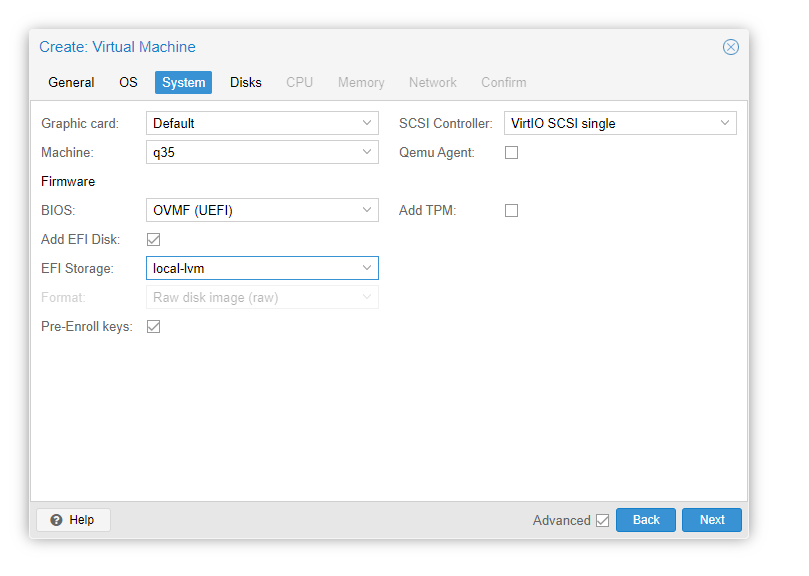
- Change the Machine to q35, BIOS to OVMF (UEFI) and select your local-lvm for EFI Storage
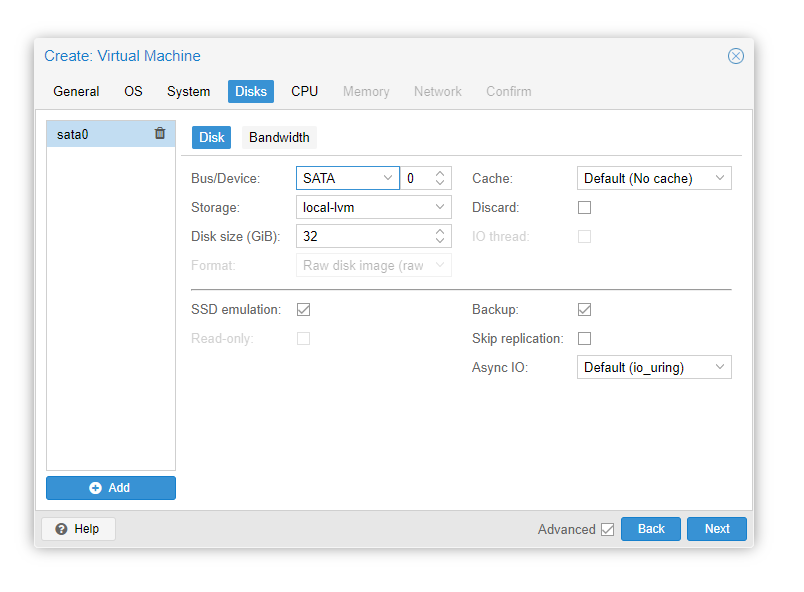
- Change the Bus/Device to SATA and enable SSD emulation, if you are using an SSD/NVME disk.
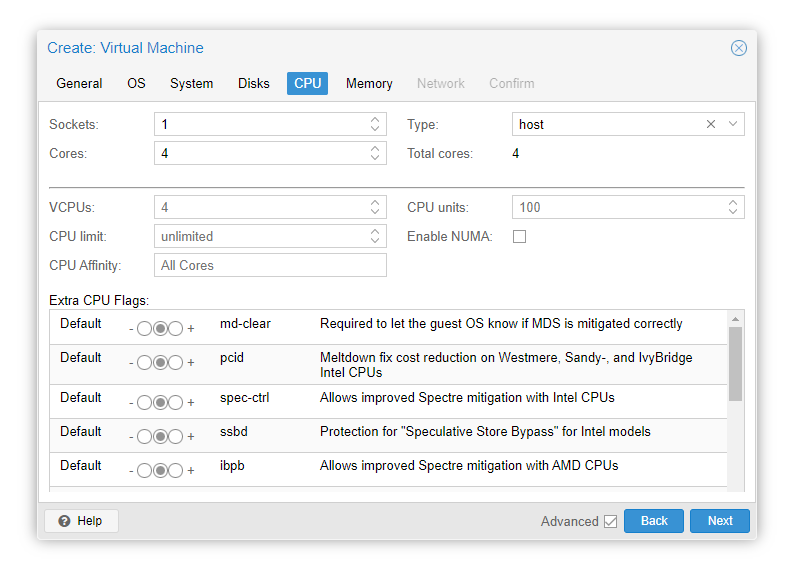
- Change the Type to host and give it at least 4 Cores.
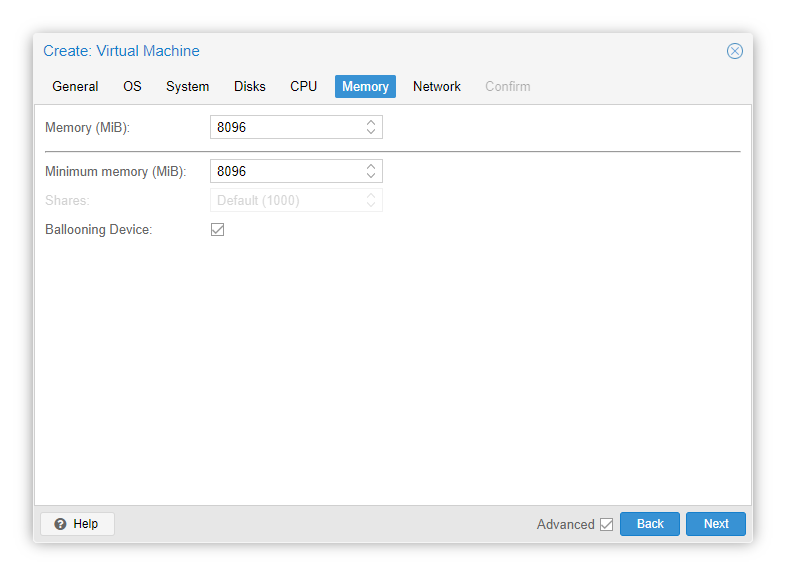
- Increase the Memory to atleast 8096 mb.
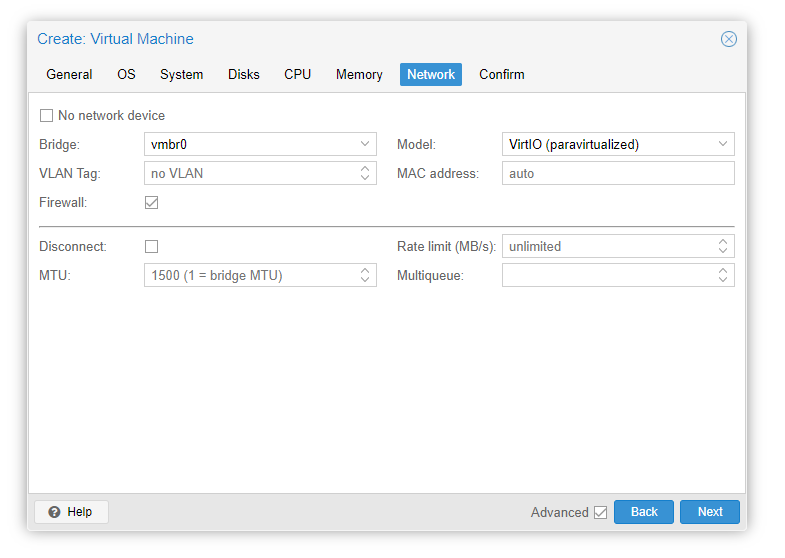
- Select the correct network bridge.
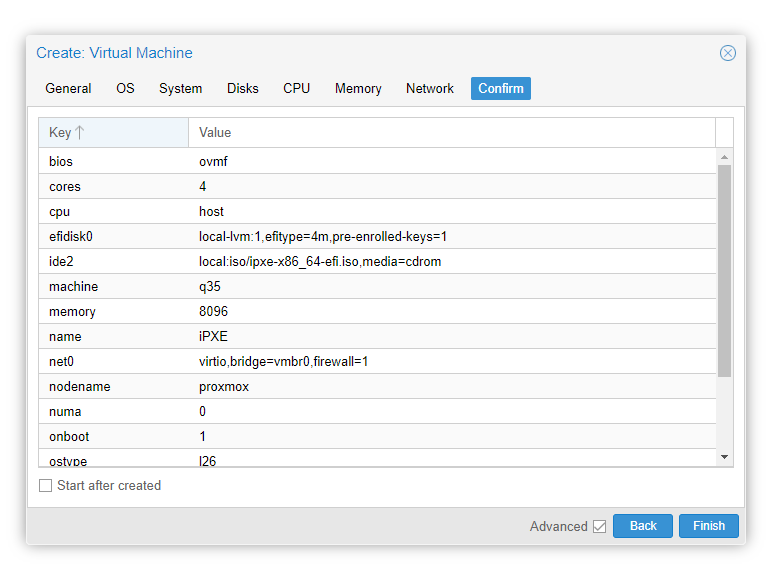
- Untick Start after created and press Finish.
UEFI Configuration
- On your first start, press ESC to enter the UEFI configuration.
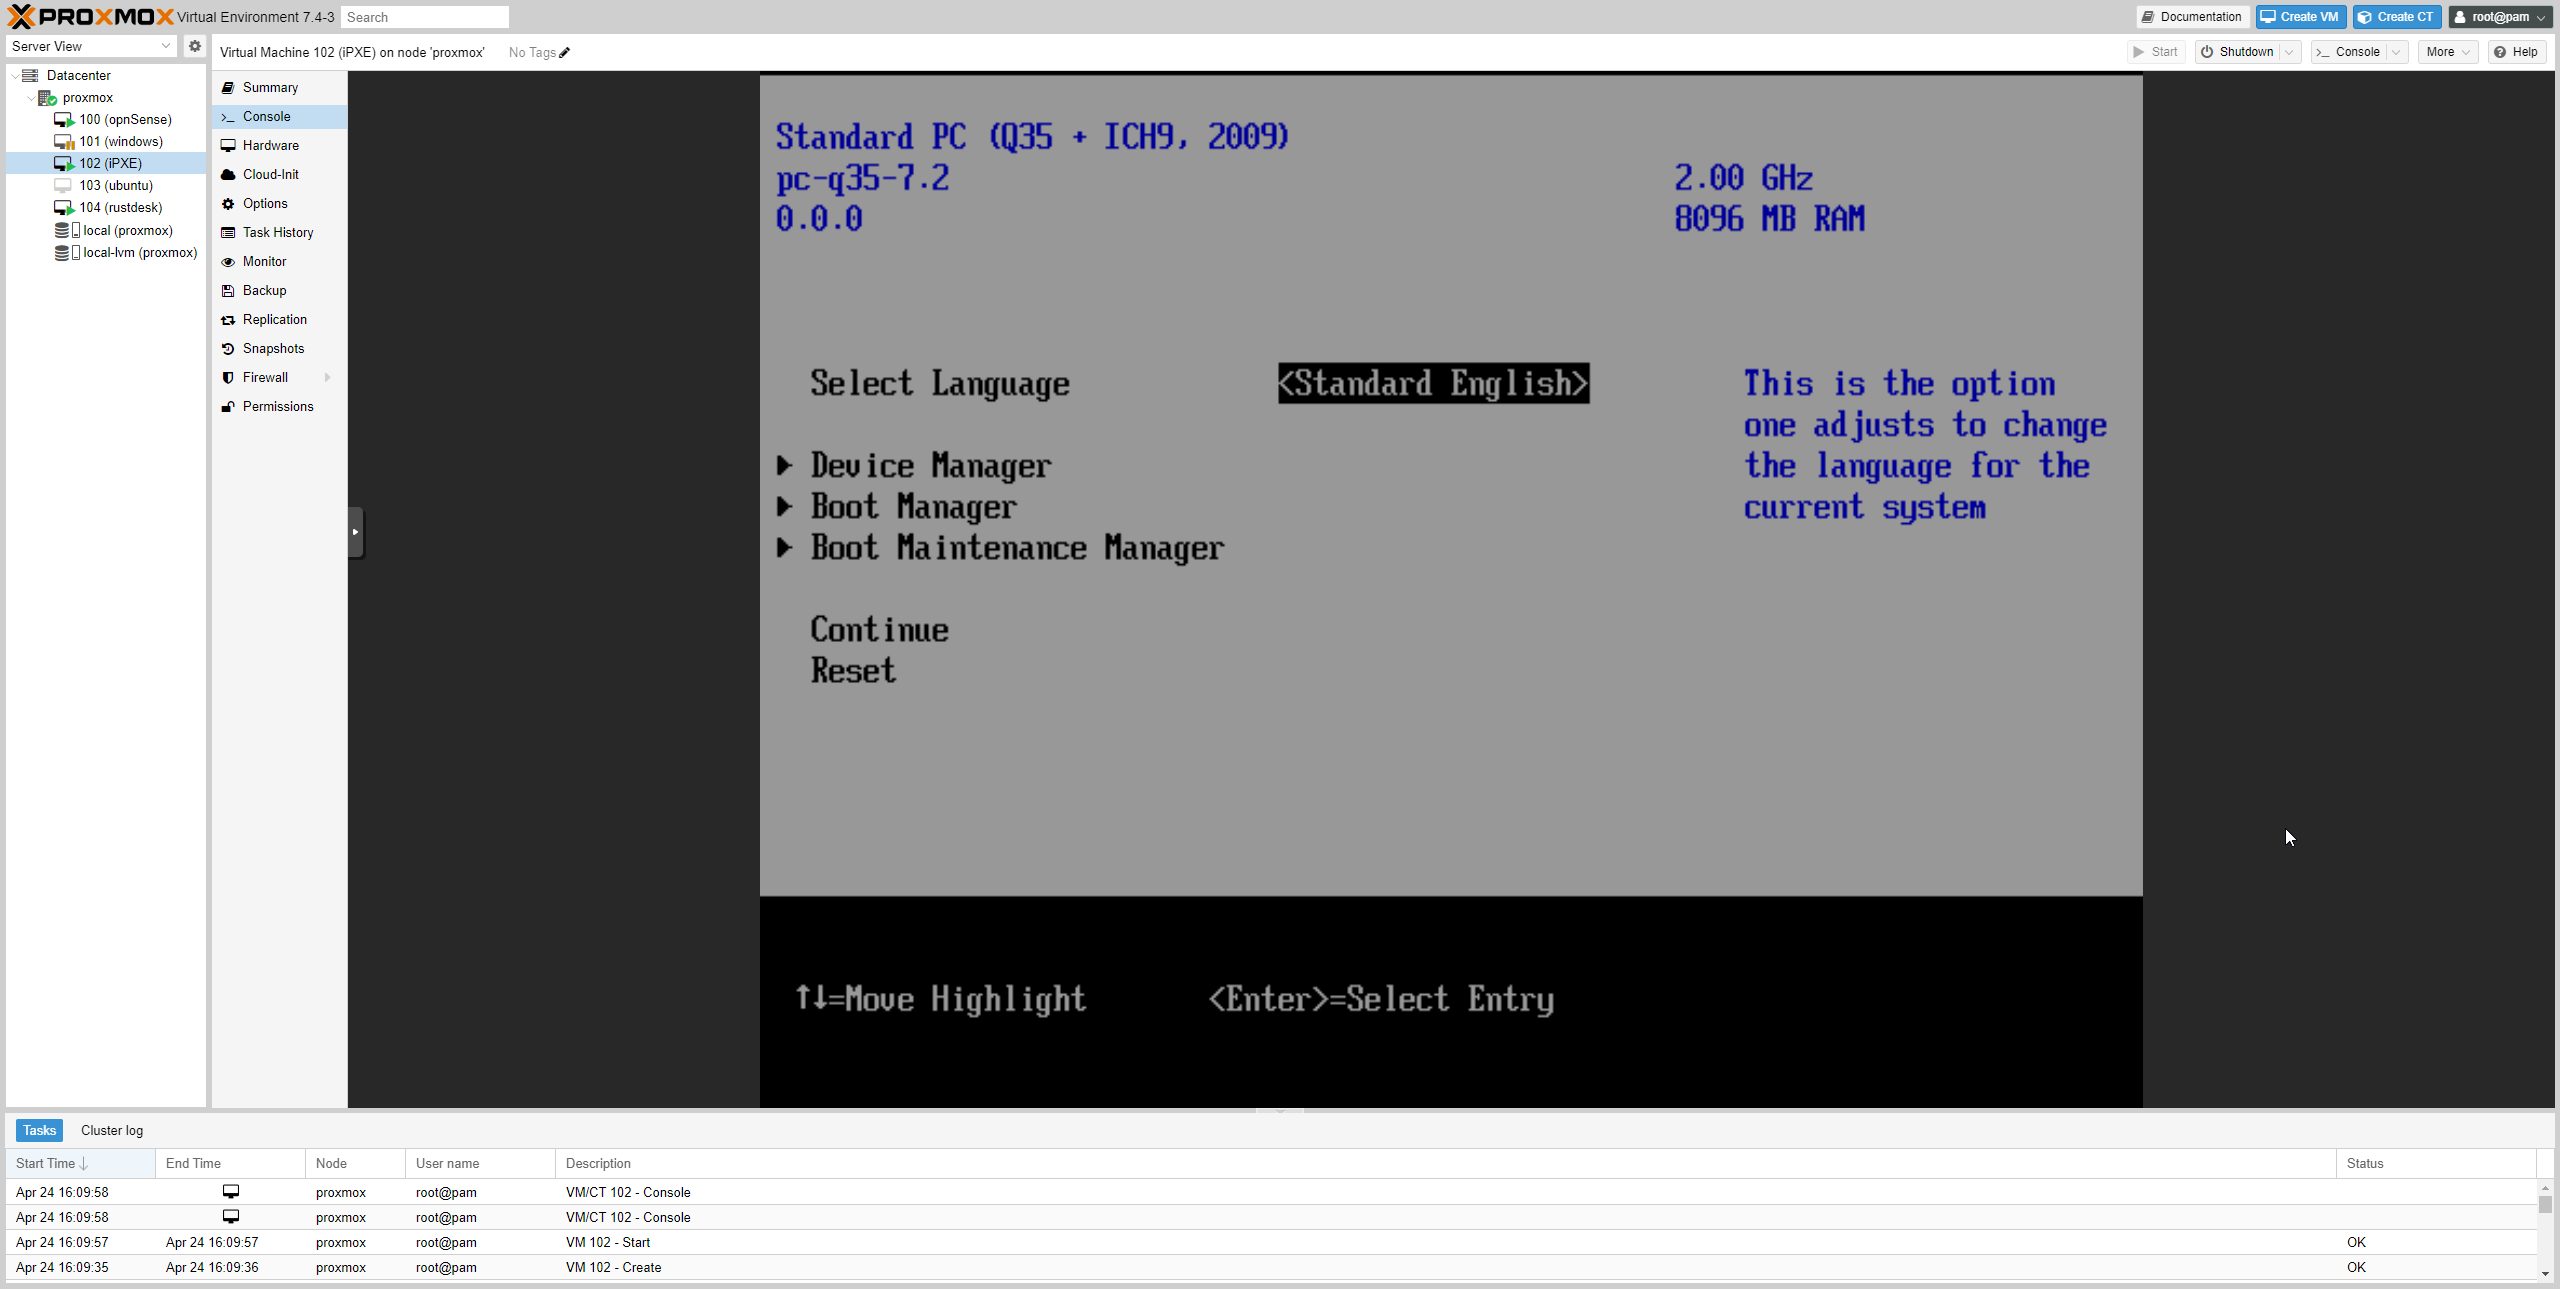
2. Select Device Manager → Secure Boot Configuration.
3. Disable Attempt Secure Boot.
4. Press F10 to save and confirm with Y.
5. Press ESC until back to main menu and select Reset. The VM will now restart and begin to install Flatcar.
Flatcar Installation
- Accept the license.
- Select DHCP, a static IP adress is currently not supported.
- Select Install to SDA in the install options.
- Confirm your settings. The VM will reboot, after the first complete boot process the command line will read
core@flatcar-0-install ~$~in green. You can now proceed.
After iPXE
- After the first start of the VM, remove the auto boot option in Proxmox. Go to Hardware, double click on CD/DVD DRIVE and select Do not use any media.
- When the VM has restarted, the command line reads
flatcar-1-umh login:in grey, it is now ready for use. Now you can find the correct IP address in the last line of the first text block.
💡
After the flatcar installation is complete, the system might reboot (approximate 5 minutes later).
Learn more about flatcar
- learn how to install flatcar on a virtual machine (VM)
- find out why we are using flatcar
- learn how to Install Tailscale on Flatcar for VPN Access


