


Prerequisites
To follow this tutorial, you need to have:
- UMH installed in a flatcar / k3d, etc. VM
- A Windows VM
- The OPC-UA simulator
Instructions
1. Installing Java
- Download the latest Java version and install it on your windows VM. To check that the 32-bit version is installed, navigate to your Programmx86 folder and search for “Java”. If it doesn't exist try downloading Java (jre) 32-bit manually.
2. Installing KepServerEx 6
- You can request a free demo here.
- Once you’ve downloaded the installer, execute it on the Windows VM and follow the installation instructions.
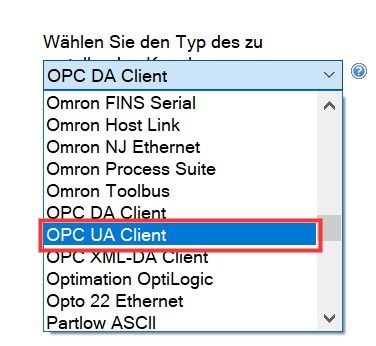
3. Adding an OPC-UA channel
- Now open “KEPServerEX 6 ”and right click on “connectivity” and add “new channel”.
- Select as type “OPC UA Client” press next until you reach the endpoint url.
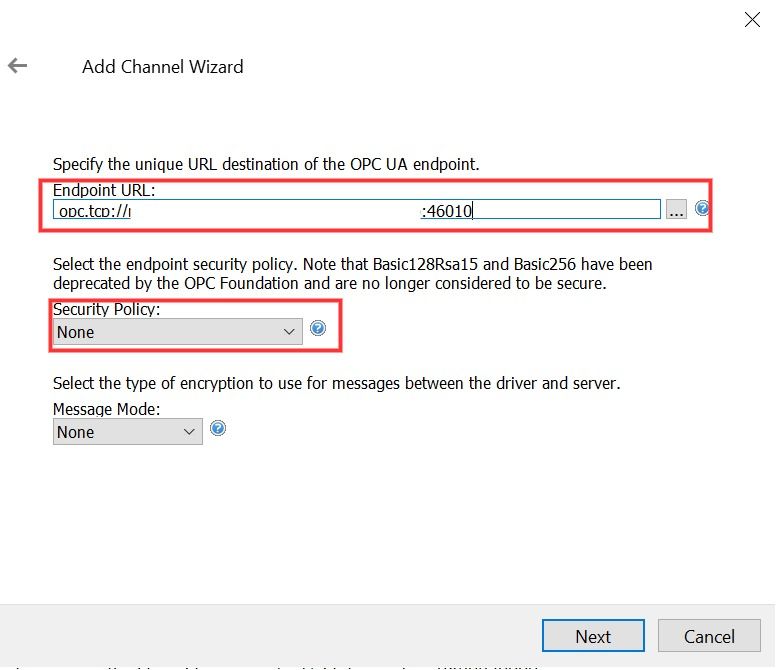
- Enter in “Endpoint URL” your hostname and relevant port. If you are using a local installation enter the opcua-simulator service name and the internal port. If you are using an external server use the hostname from that server you added in the config-file. Select “none” as “Security Policy”. Then click next and finish.
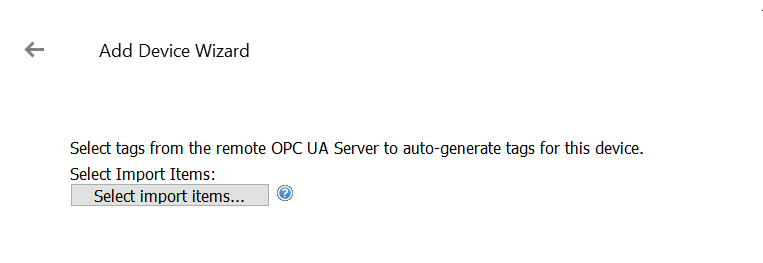
- Click on “Click to add a device”

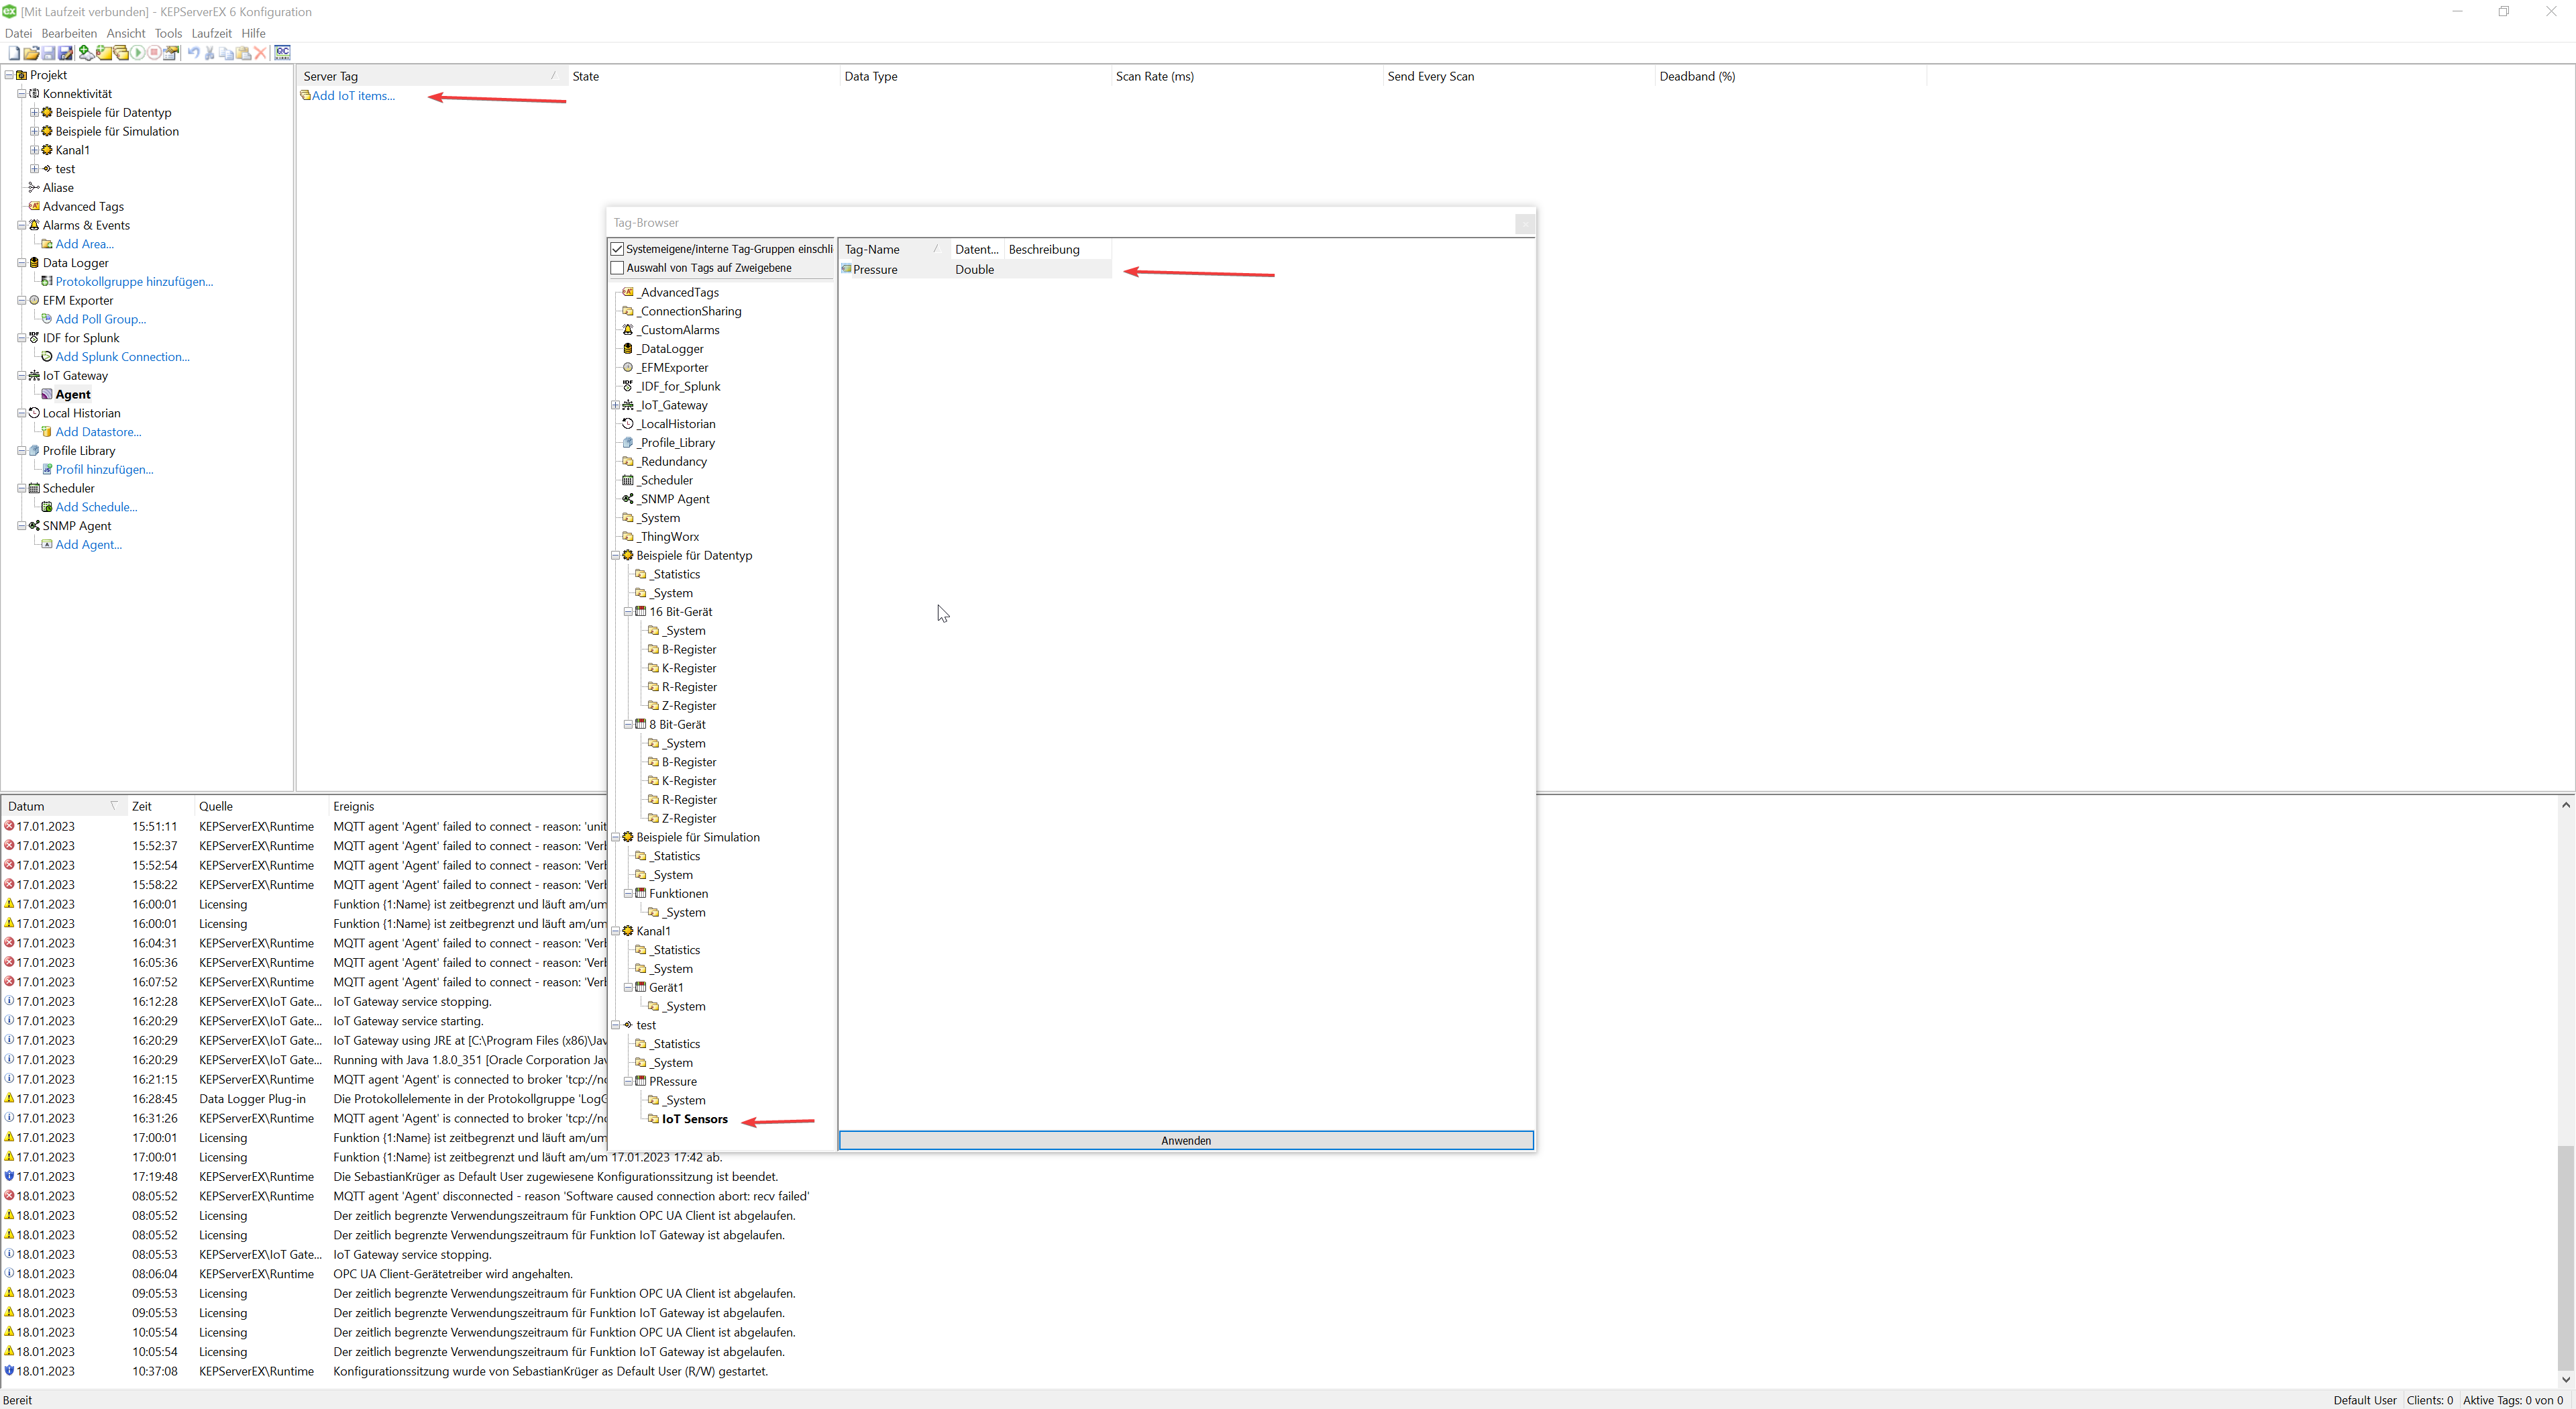
- Skip through the process until “Add Device Wizard” where you click on “Select import items..”
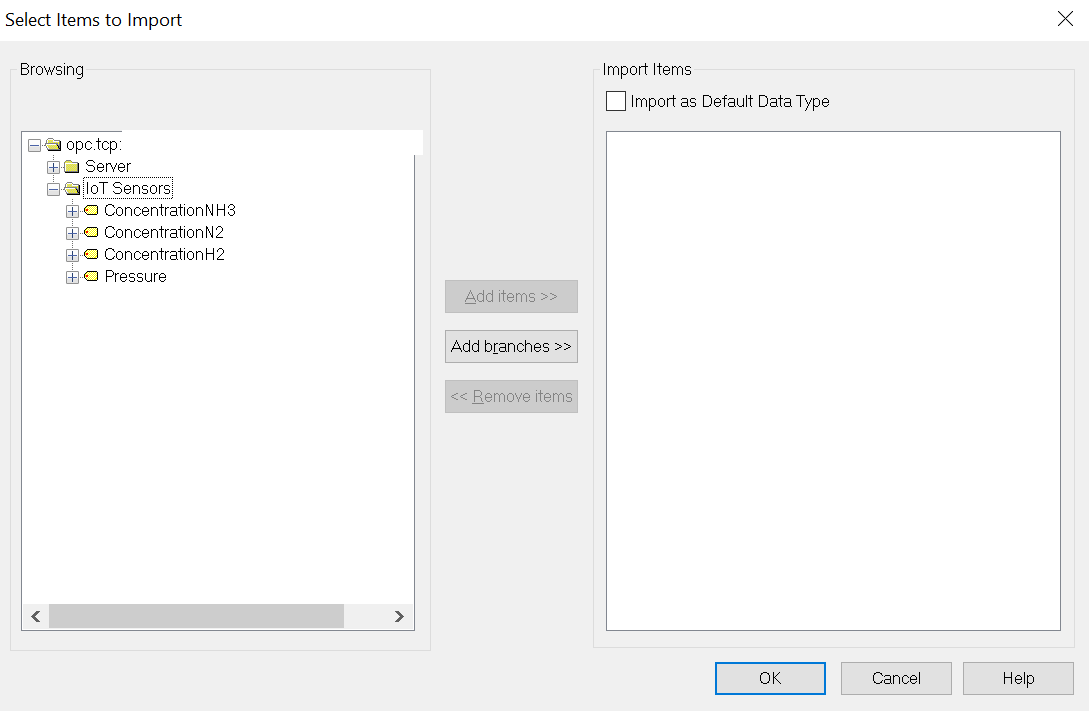
- Here you can choose one of our “IoT Sensors” of our OPC-UA simulator. Simply select the sensor, click on “Add items” then “Ok” and procceed with the setup.
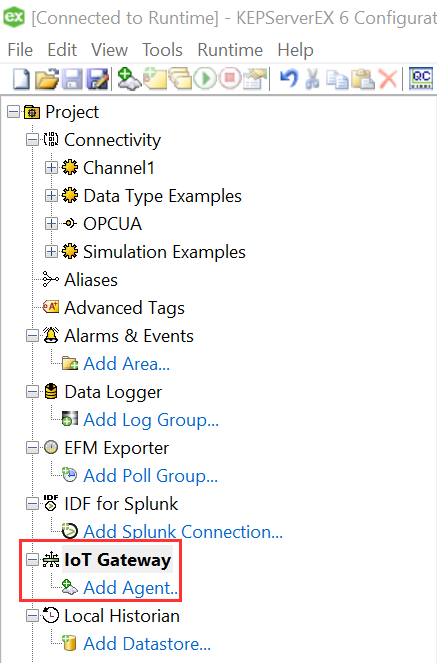
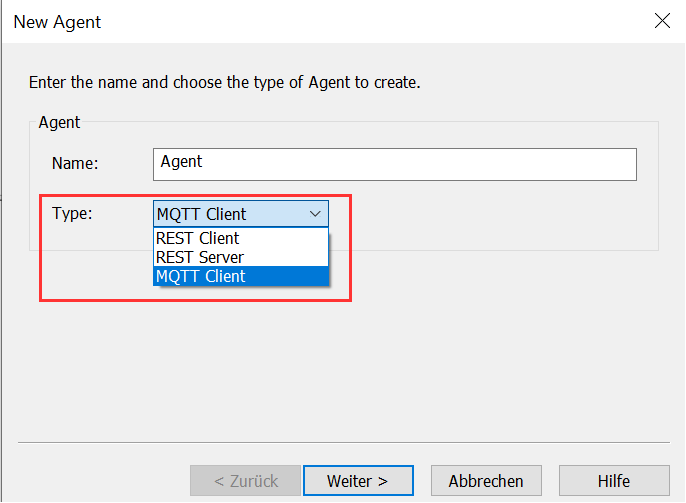
4. Creating an Mqtt-agent
- Click on “Add Agent” on the left under “IoT Gateway”.
- Enter an agent name, select “MQTT Client” under type, and click next.
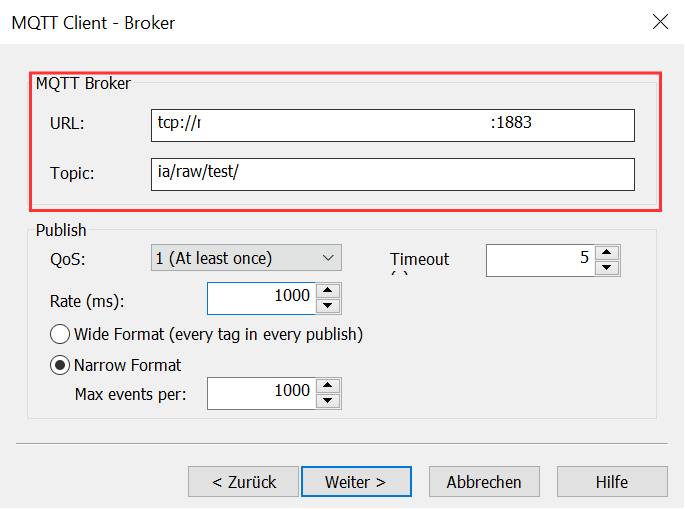
- Next we configure the MQTT broker. Enter in URL your hostname or IP and leave the protocol (TCP) and port as autoconfigured. Decide on what topic your data should be subscribable to. In this case, we are using ia/raw/test/. In the publish tab, you can also select your QoS (Qualityof Service) and your publish rate. When you’re done, click next.
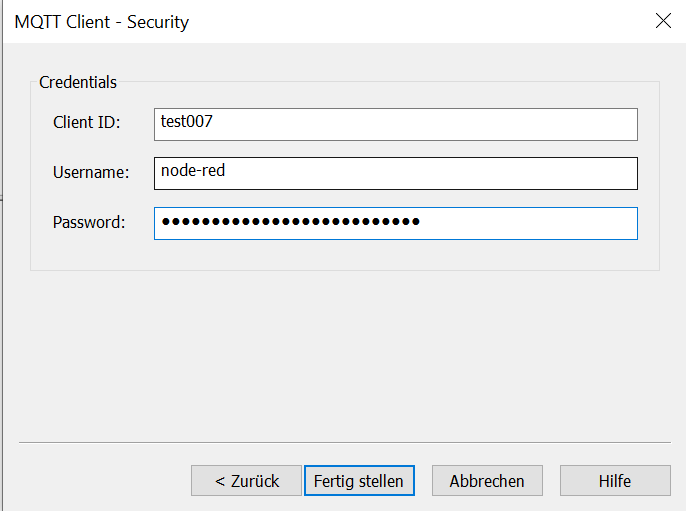
- The last thing you need to do is to configure the credentials for the agent. Choose a unique Client-ID and enter in Username node-red and as password INSECURE_INSECURE_INSECURE. Then click on “Finish”.
- If everything is working, a massage like the one shown below should appear in your console at the bottom.

- Click on “Add IoT items”
- Select the configured OPC-UA sensor and click on “Apply”
- To ensure that Kepware is working correctly, you can open Kowl/Redpanda in OpenLens under “Services”. Check if data is flowing through the specified topic.

Summary
KEPServerEX is a software platform that enables users to extract data from a wide range of industrial machines and devices, including those that do not support common protocols like OPC-UA, S7, or Modbus. With 142 drivers available, KEPServerEX’s library is significantly larger than that of Node-RED, which is included with the UMH. This makes KEPServerEX a valuable tool for connecting older production lines that need to be connected but do not support standard protocols. In this tutorial, we showed you how to install and configure KEPServerEX, connect it to the UMH, and configure data sources and devices to take full advantage of the data being collected from your production equipment. If you want more tutorials like this let us know over discord!


